This is a UE5 shader that I've been making as part of R&D for a personal project.
The starting idea was to see how far I could stylize a material towards a strong paint effect, without using post-process materials, and without adding a shading model to the engine.
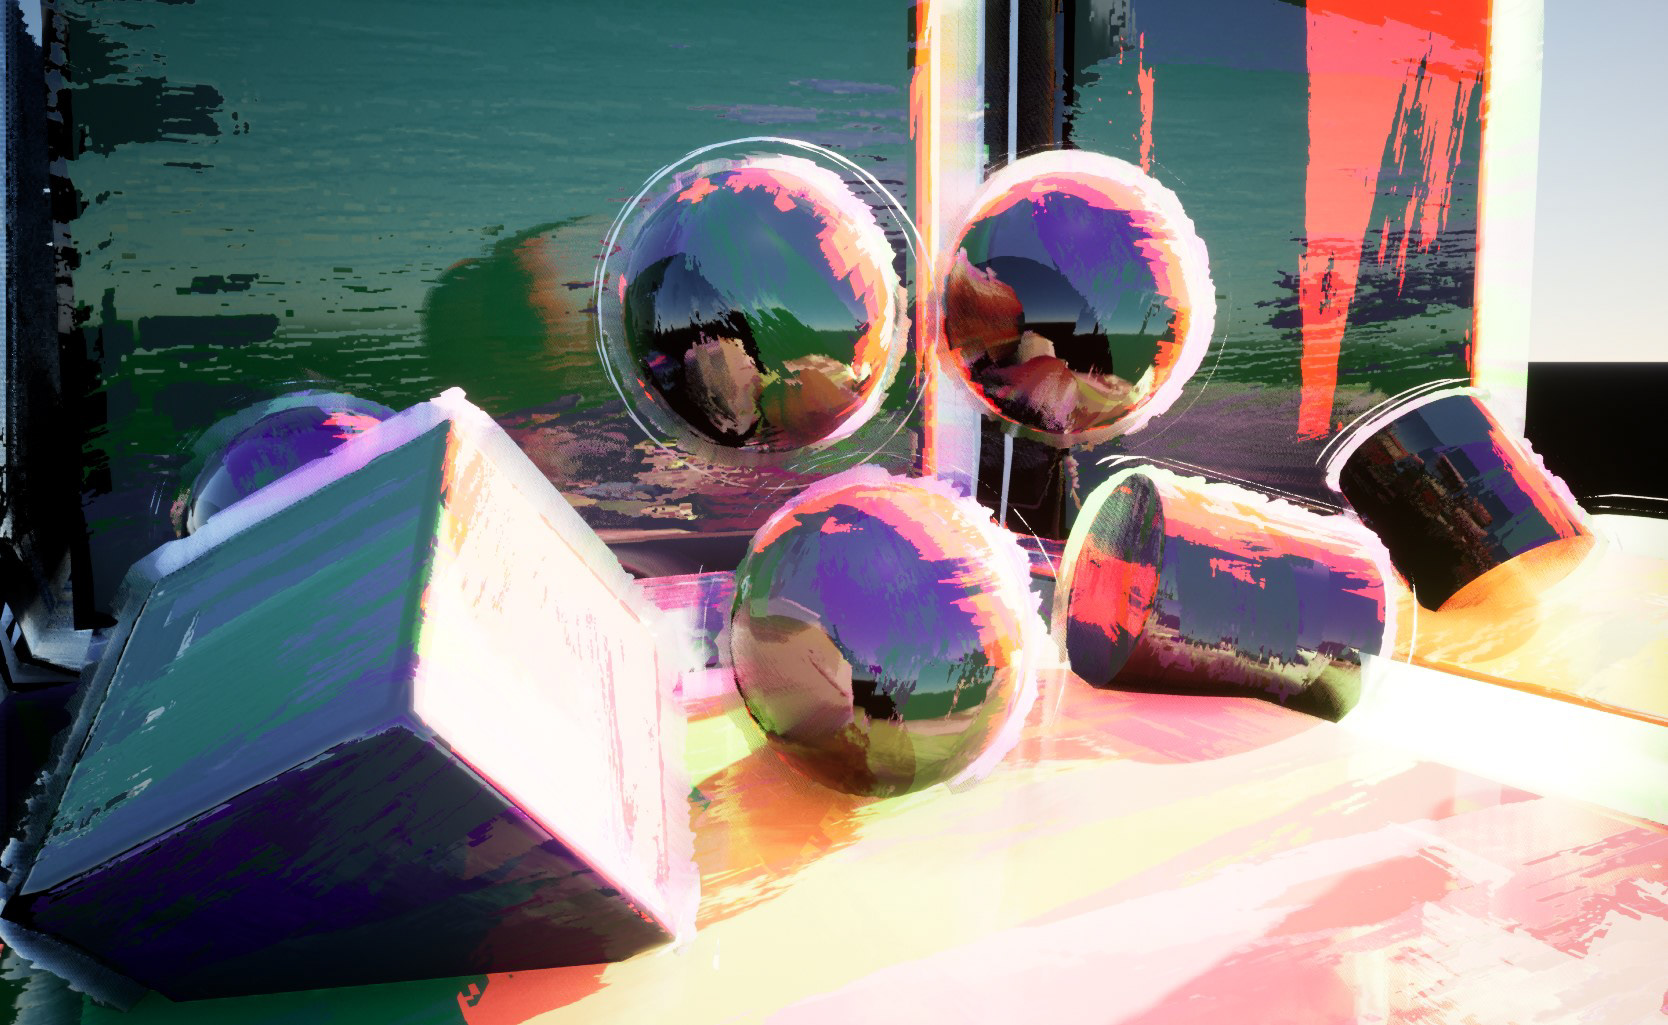
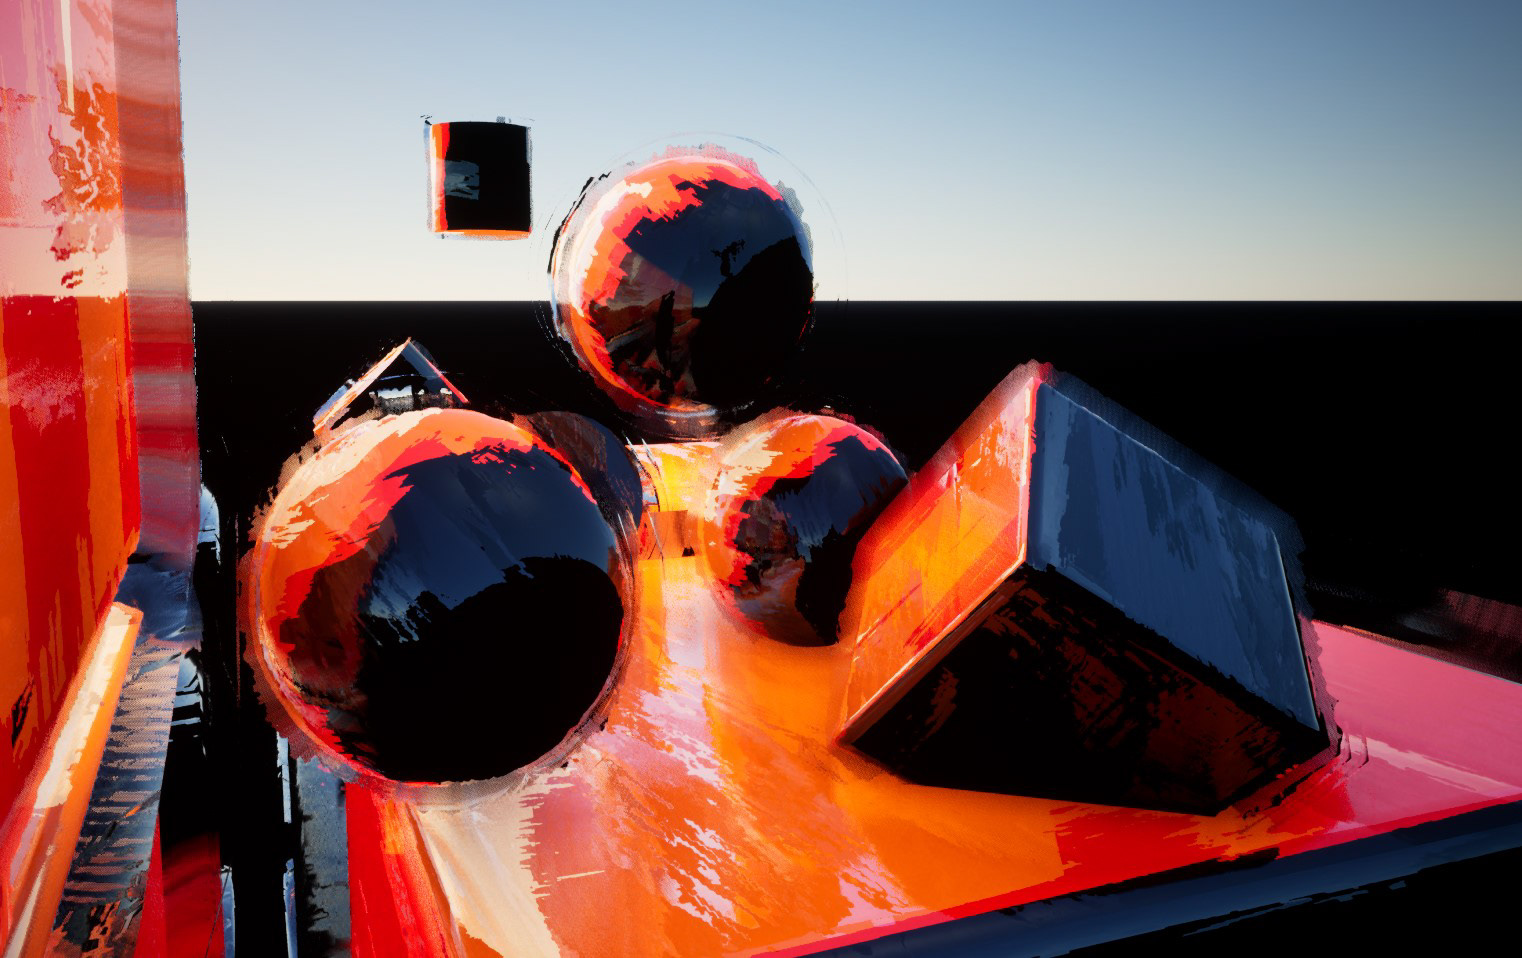
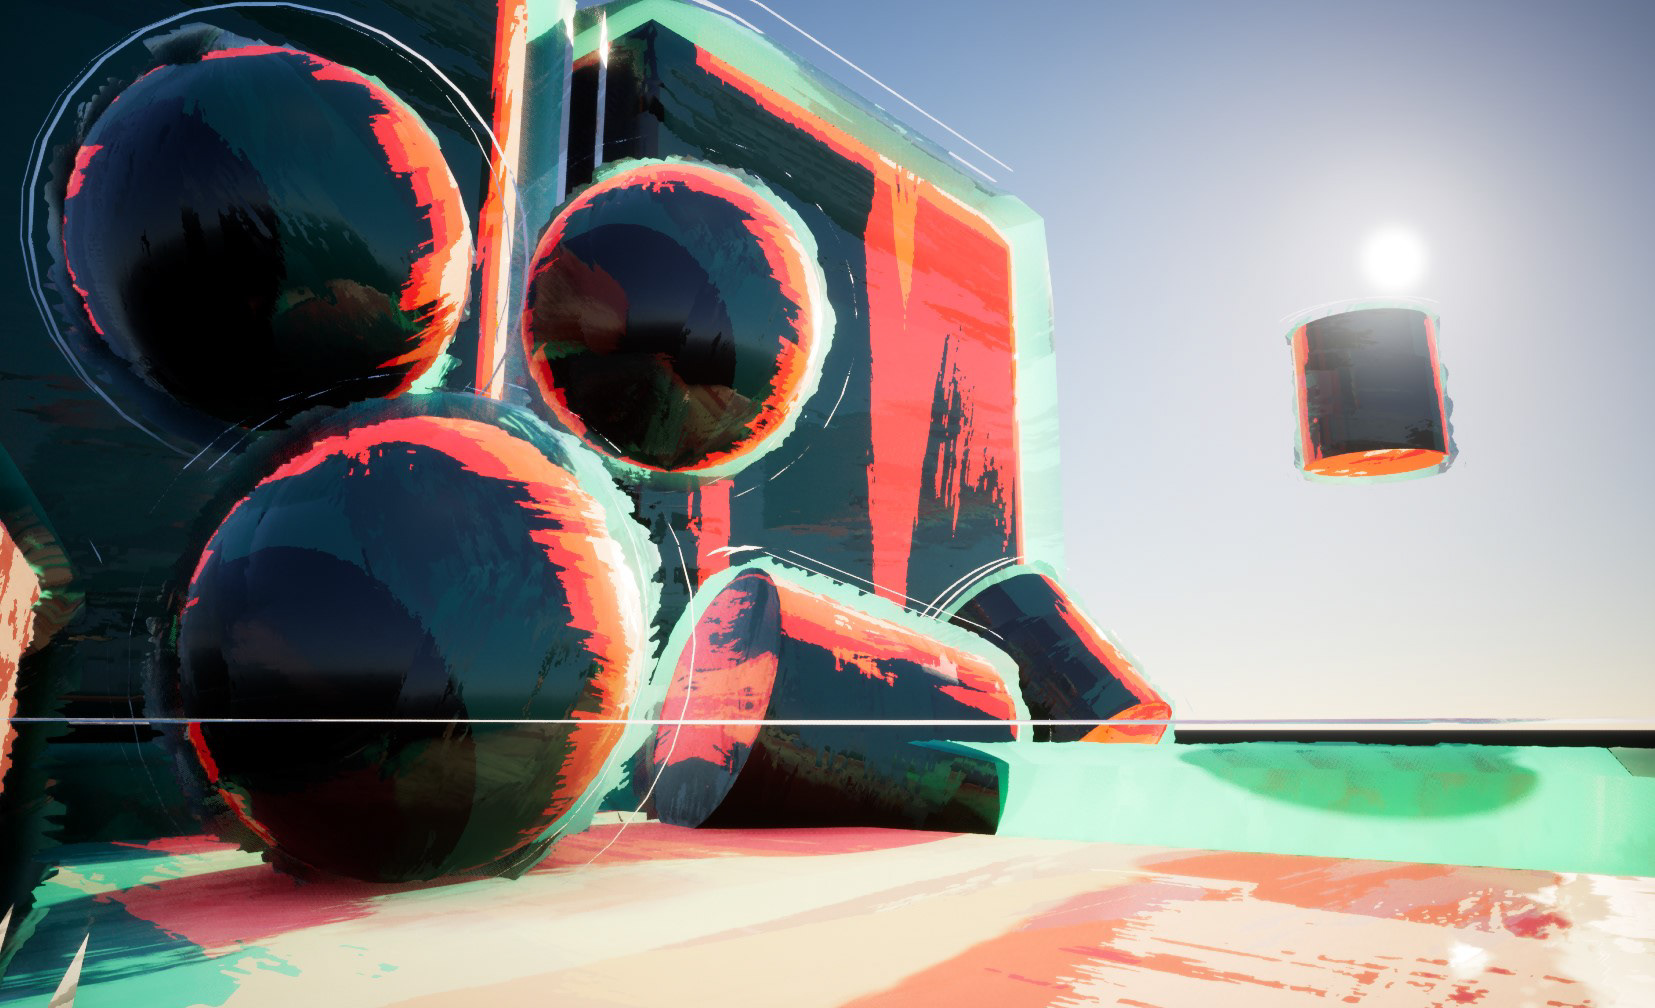
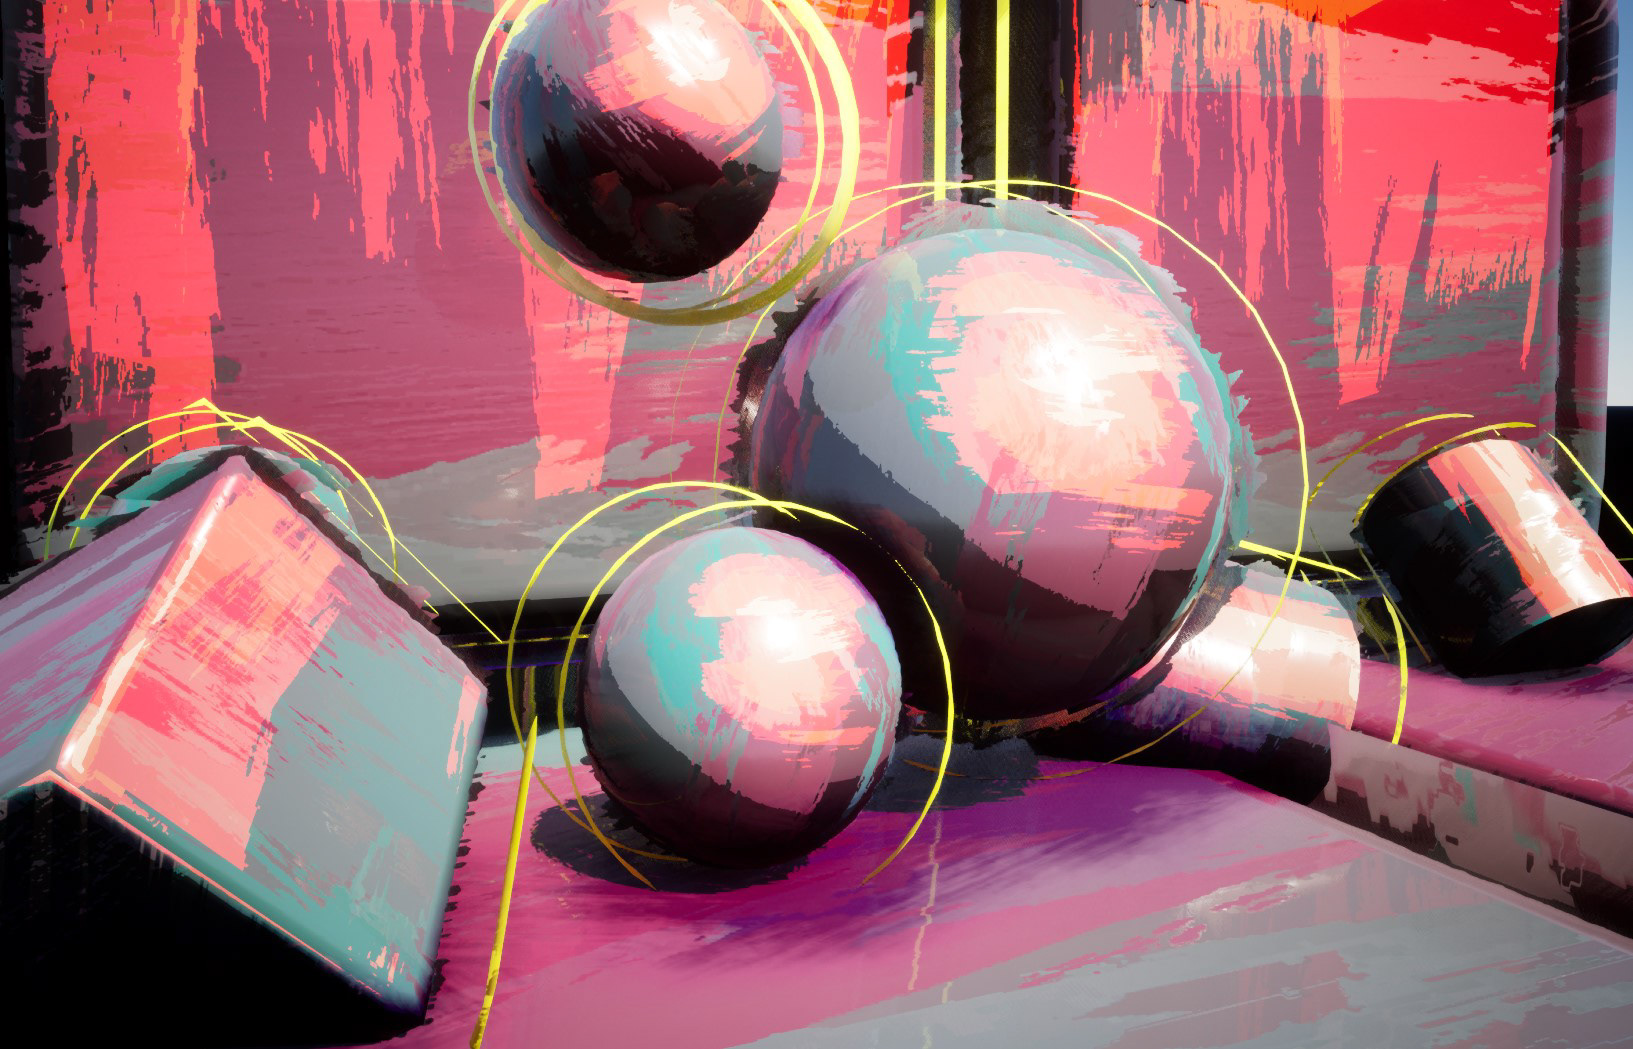
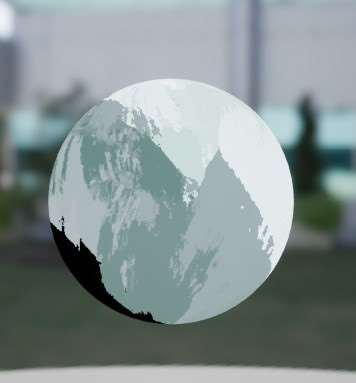
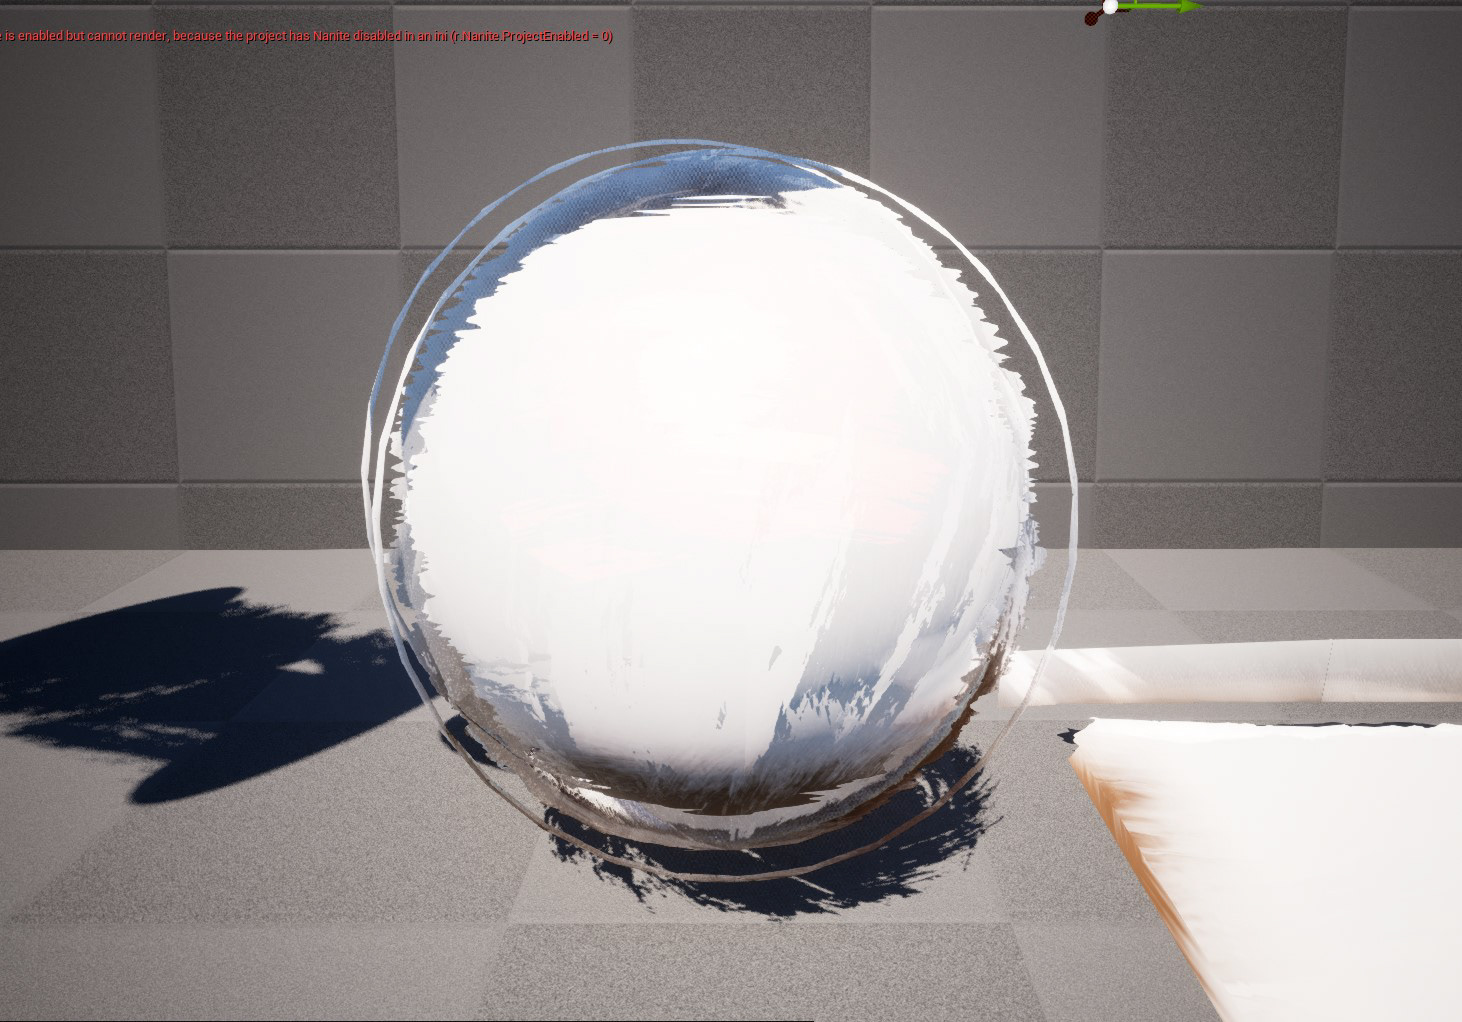
The final result:
Some limitations:
I created this shader as R&D for a personal project I'm working on. It's a weapon manipulation and shooting simulator (Pavlov VR meets Duck Hunt?), and I intend to mix various styles within it, such as paint, drawing, PSX, DOS, etc.
One limitation is that I will not be using post process effects, since I want to be able to mix these several styles in one scene seamlessly.
Various personal workflow considerations have also impacted the choices I've made, the same result can be achieved in various ways and most of the modules I will describe are self-sufficient.
This is end-of-R&D stage, not a production tested shader, it achieves the result I wanted, but it may evolve a lot still when problems inevatably arise with new use cases.
Creating the textures
For this shader we will need only one texture, but we will pack it with a normal map on the Red and Green channels, and two additional maps in the Blue and Alpha channels.
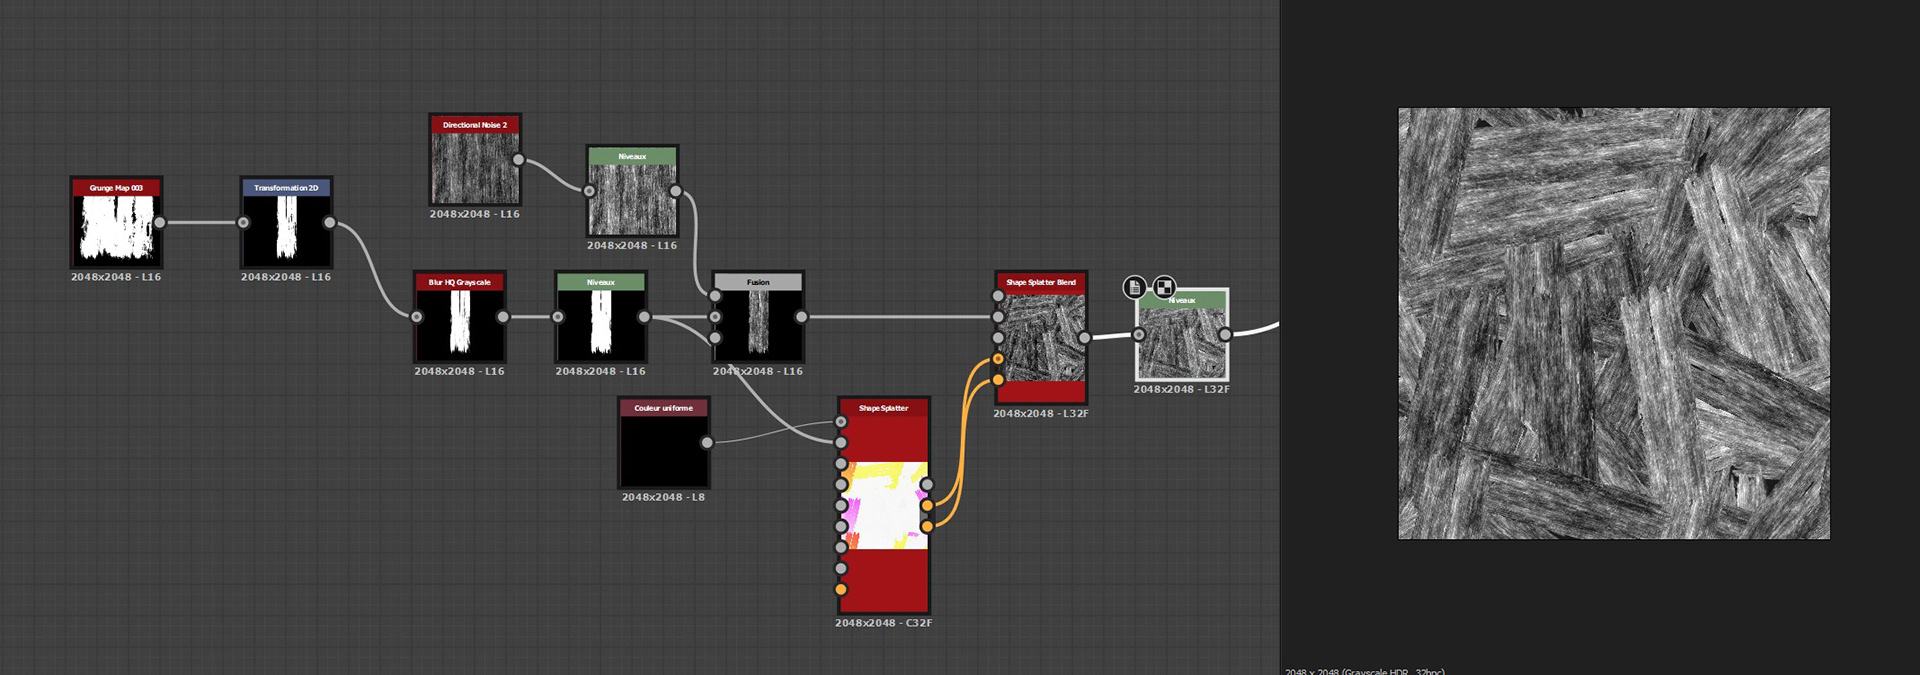
The textures are created in Substance Designer and are really quite simple.
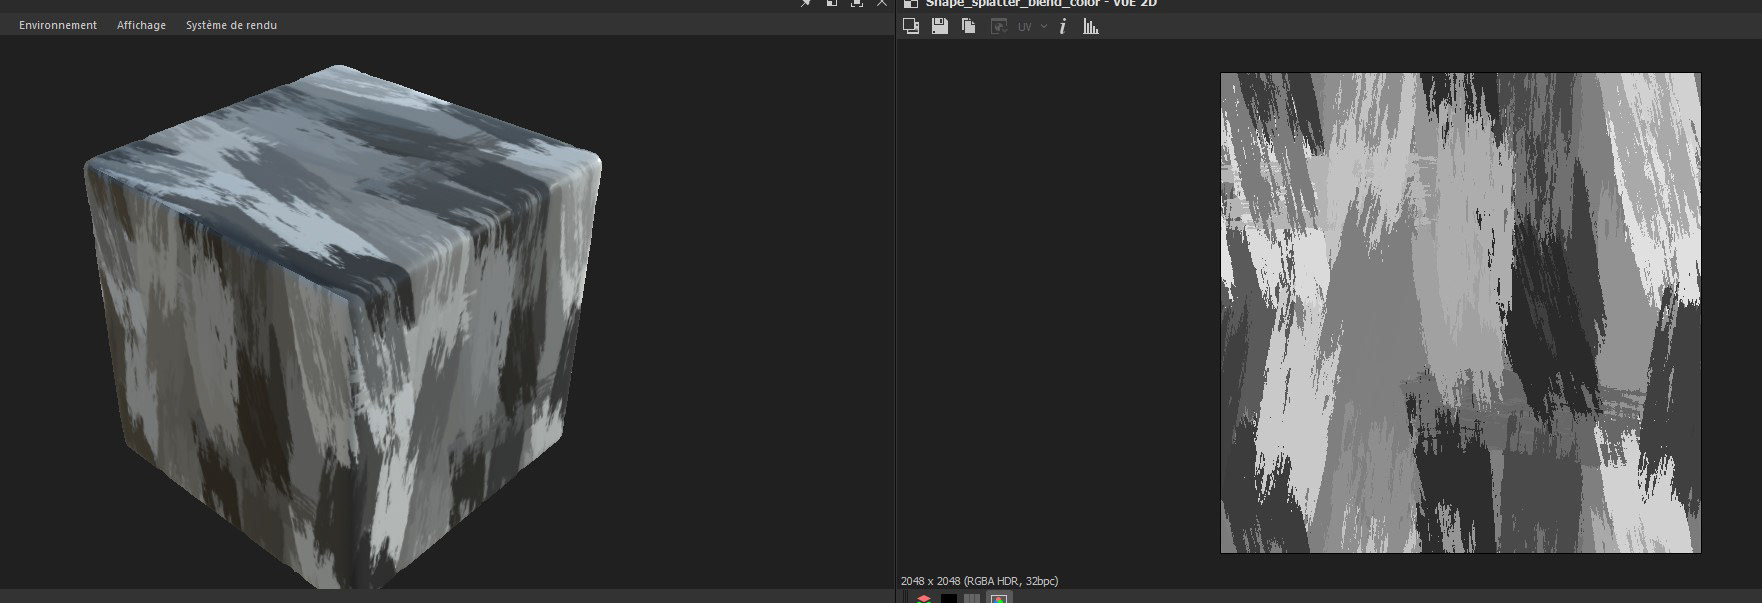
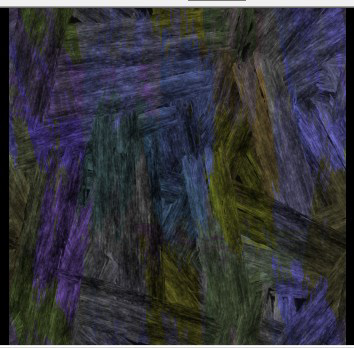
For the diffuse, we use a mix of a blurred square shape and a grunge map to create a single paint stroke, that we then scatter on our map with random grey values:

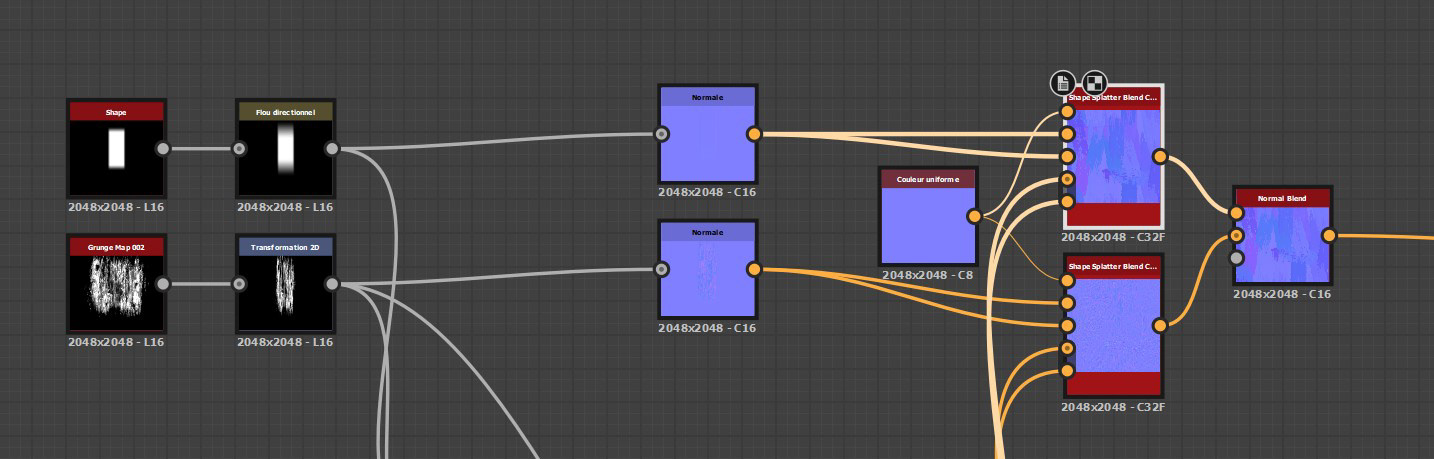
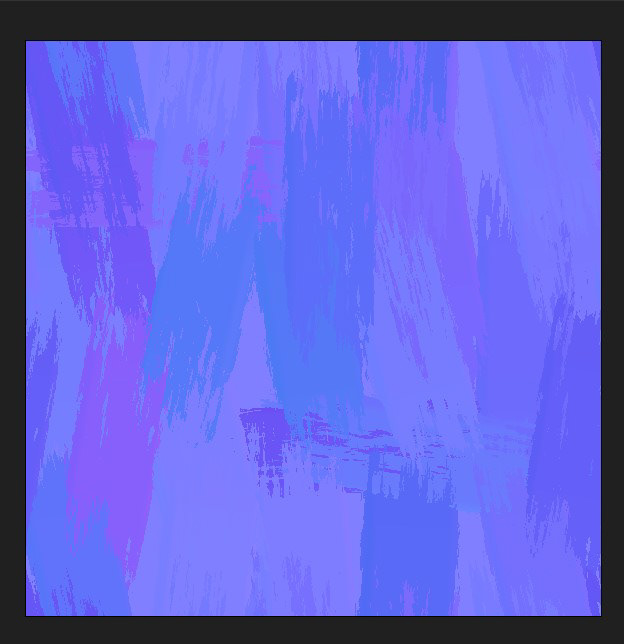
The normal map is the most important part. For this we scatter the same shape, but we take a normal vector and randomize it quite strongly, like each paint stroke was pointing in a different direction completely.
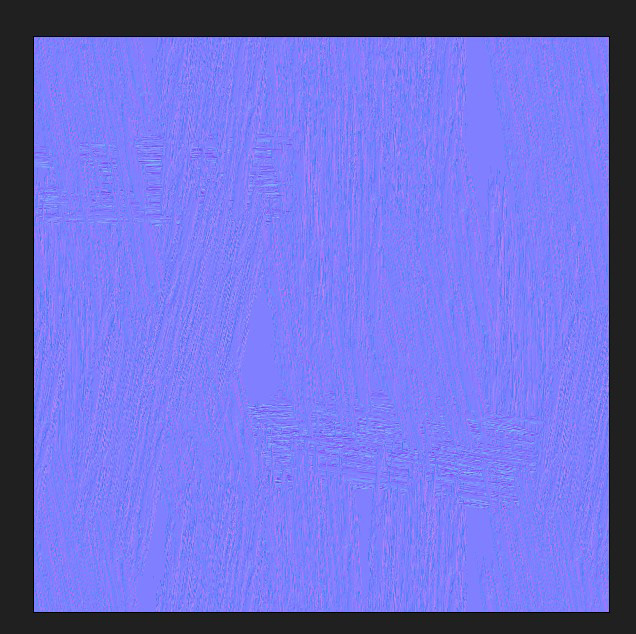
Then we mix it with a generated normal map for the brush details.
There is one last map to create, a secondary mask that will give us another brush stroke pattern with more detail and a different scale. This texture is very contrasted and uses the full value range, as we will be using it to blend gradients.
Once packed, we have our one and only texture. If you are surprised that we are not keeping the blue channel of the normal map, it is an optimization technique more often used for consoles to preserve memory.
Armed with this texture, we can start our journey in UE5, with the help of Blender as well. I'm using UE5.1 for this project.
Unreal Shader
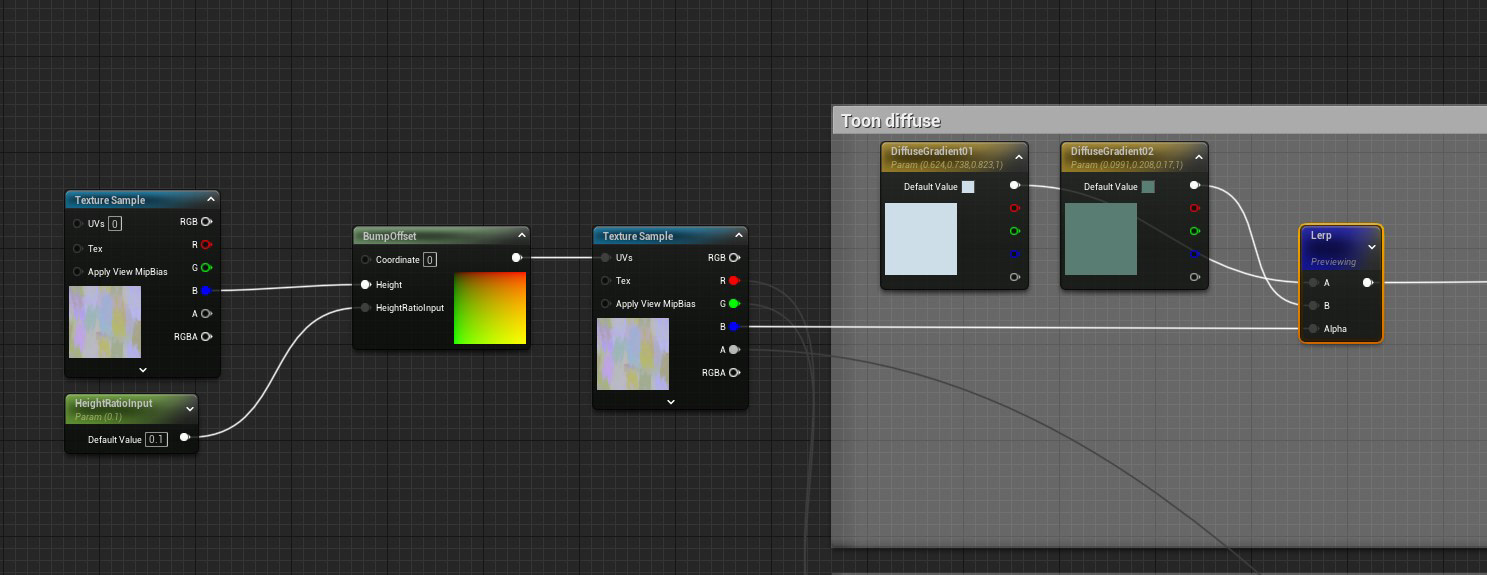
The first step is creating our diffuse. We will use the B channel of our map as a gradient to interpolate two input colors, that we can set as parameters to later change the colors of the material instances.
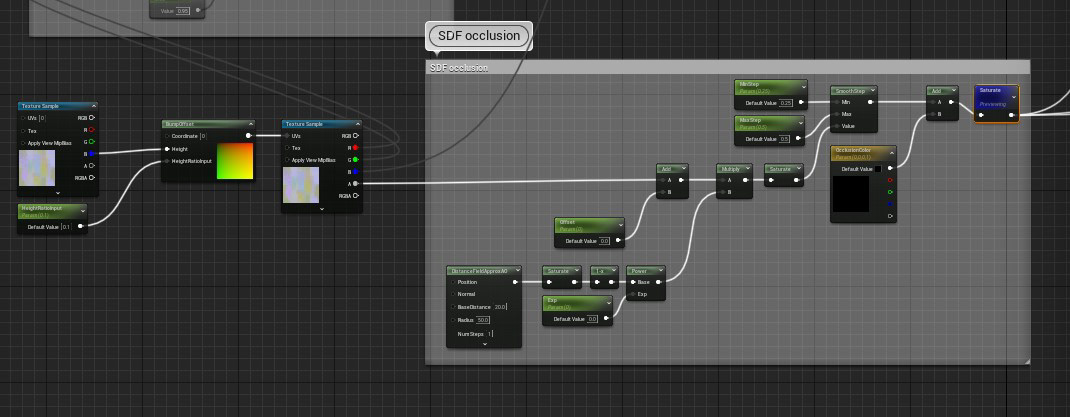
This step is very straighforward, but there is already one little trick that does wonders in this case, which is using the BumpOffset (a cheap version of parallax mapping) to give some depth to our brush strokes. Bump Offset can break down at shallow angles or high height values, but this actually works to our advantage in this case, as the effect works pretty well with our paint effect! For the height map we simply use our blue channel mask and voila!
Once this is done, we can create a simple toon lighting effect using the input from the SkyAtmosphereLightDirection. Note that this will only work with the scene's sun. However, it works just as well with inputing a custom direction here that can be updated through a blueprints script.
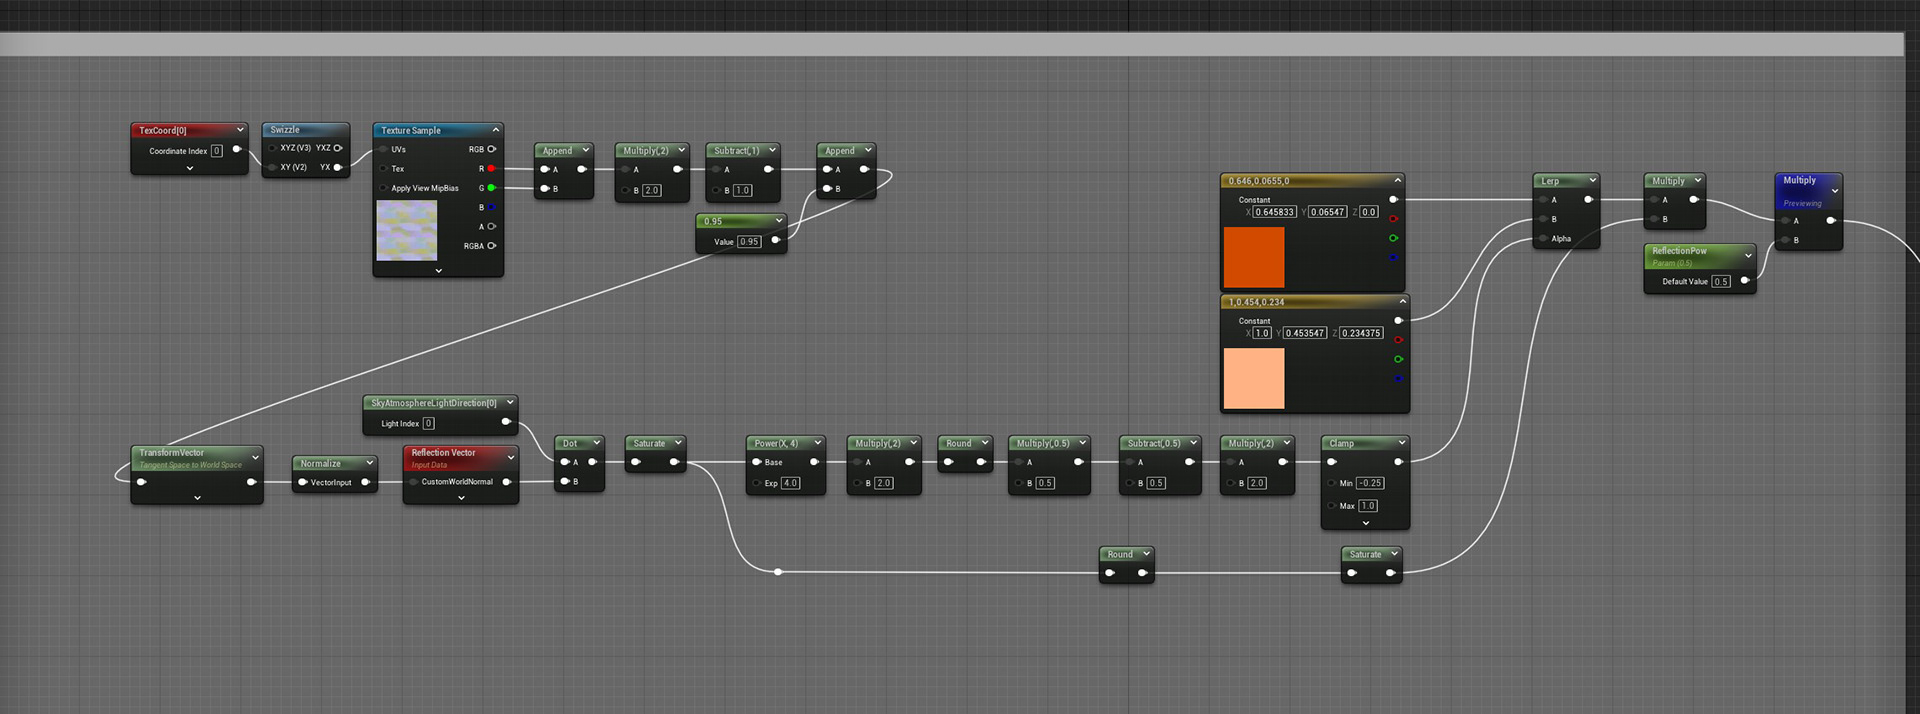
Since we have additional information in our normal map texture, we can't let Unreal process it as usual and we have to manipulate it a bit to make it digestible by the engine. Unreal expects a -1 to 1 normal range instead of 0 to 1 like encoded in a texture. It's as easy as multiplying by two and substracting one. Instead of reconstructing the Z component of the normal vector, we simply approximate it, appending a .95 value to our vector.
Then we transform this normal to a world space vector, and compare it to the sun light angle. Through a quick manipulation we get a stepped gradient with values 0, .25 and 1 than can be multiplied against our texture.
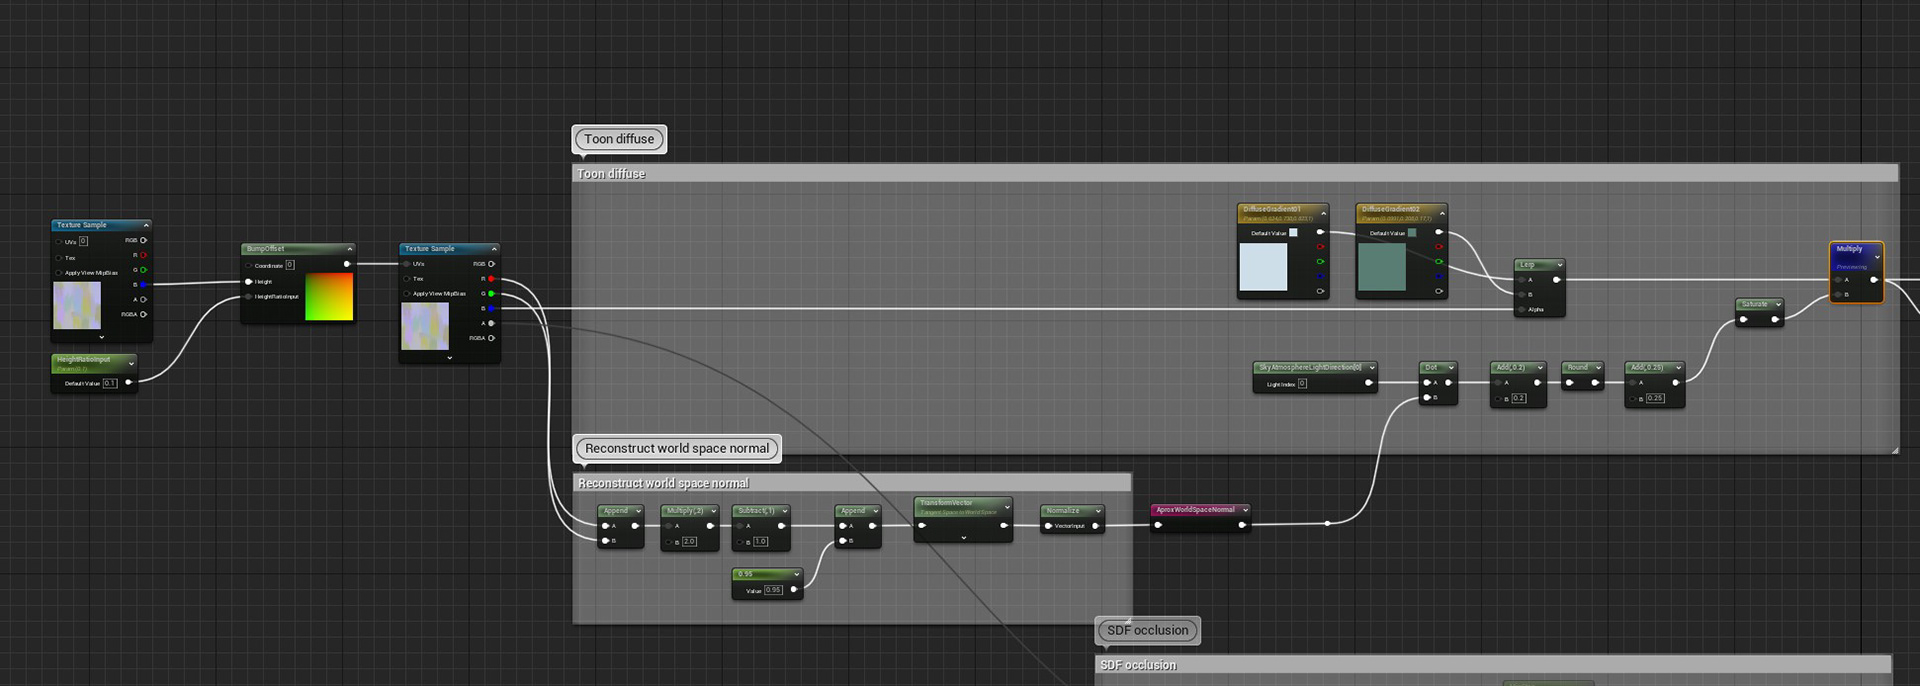
Now that we have a base for our diffuse, we can move on to the reflections.
The process is more or less the same, but instead of comparing the world normal with the light vector, we compare the light vector with the reflection vector (through which the world normal is passed), and we use the dot product to lerp between colors instead of returning just values. Please not that the math here is sub-optimal.
To avoid getting the same brush pattern as the diffuse, we simply swizzle our TexCoordinates to get a pivoted normal map.
For me this effect is really what gives life to the paint effect. You can see the colors dancing when the object moves and it feels quite liquid and oily.
Note that the colors here are semi-hard-coded, as input parameters, but you could derive the colors from the light and environment as well.
SDF Occlusion
The third component of the base material is the occlusion.
Since Unreal has bound itself quite tightly to mesh Signed Distance Fields with Lumen, we can take advantage of this feature for occlusion a well. This is an expensive method for occlusion, perhaps the most expensive part of the shader, which is why this particular graph will be put behind a static switch to be enabled or disabled depending on use cases.
Below you can see the ApproxAO after only a few tweaks to get the appropriate falloff and constrast.
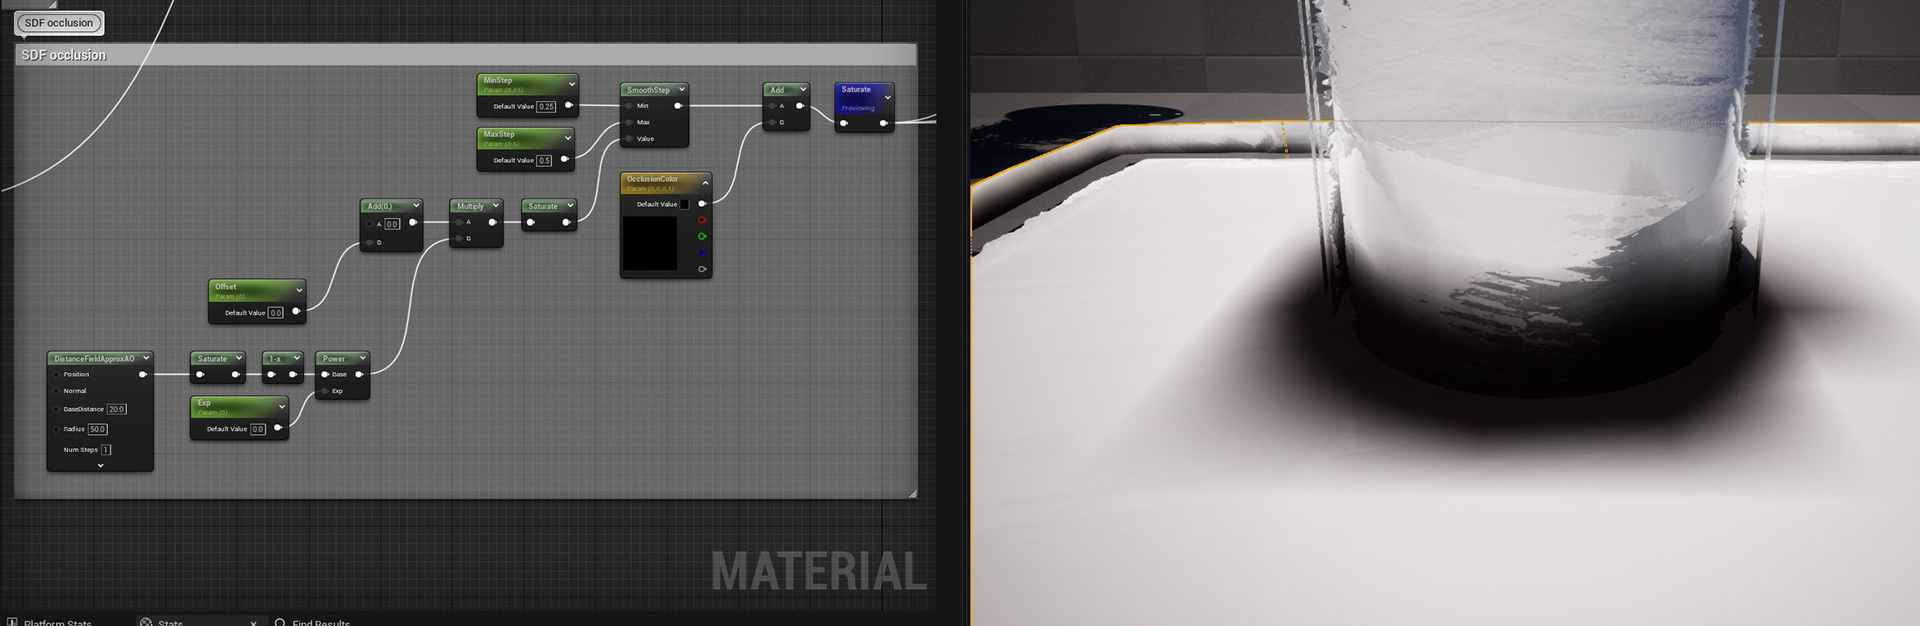
We then use the same texture sample as the diffuse, but using the alpha channel, to erode the gradient and get some nice brush detail. As a reminder this map sample also uses the bump offset, so the AO brush strokes get some nice depth as well.
A little problem with Fresnel and edge detection
Here I need to take a little break to introduce a problem - and the solution I've used here.
You may very well know the fresnel effect, it's very useful and wildly used. Basically it gives a higher value when the surface of a mesh is at a shallow angle, and a lower value when it's facing the camera.
You can get a cheap fresnel with the dot product of the world normal and the view direction like so:
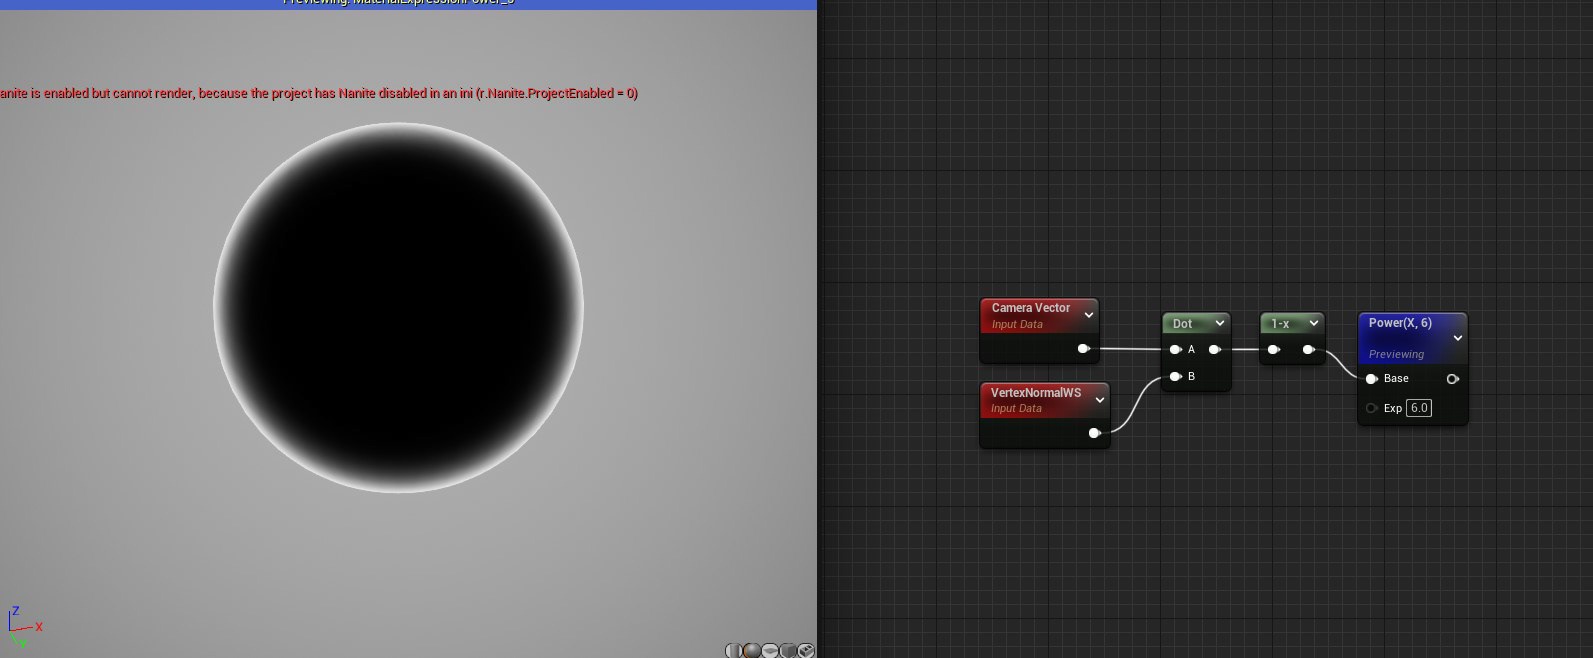
Well great - you say - this is a great way to get some form of edge detection! And it is - until you try it on a flat surface, like a cube, or a cylinder:
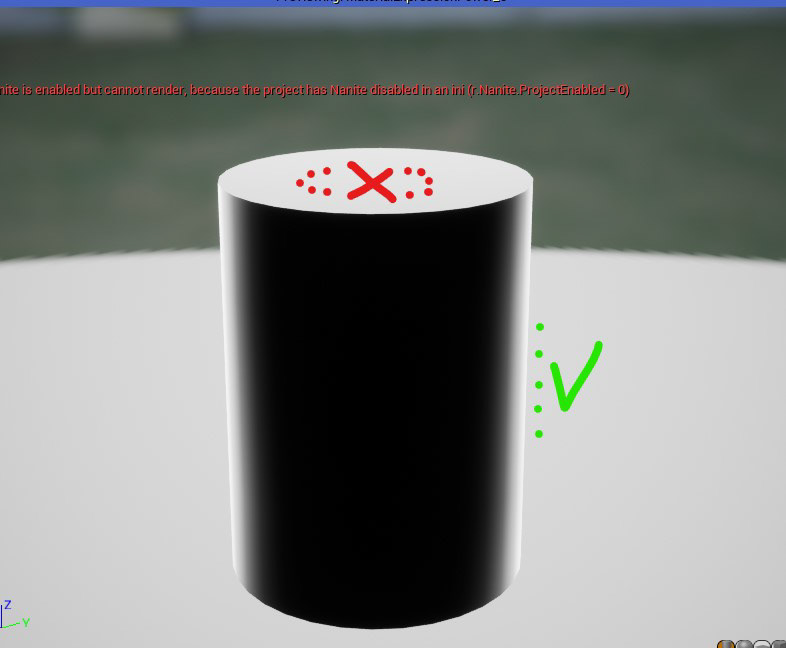
No bueno, no bueno at all. The whole top face is white and we will get unwanted artifacts if you try to extract edges from this.
One solution is... Don't use flat surfaces. At all. Import all your objects with smooth shading and/or chamfered edges. This mitigates the problem, but with quite a significant drawback if you *need* those flat faces.
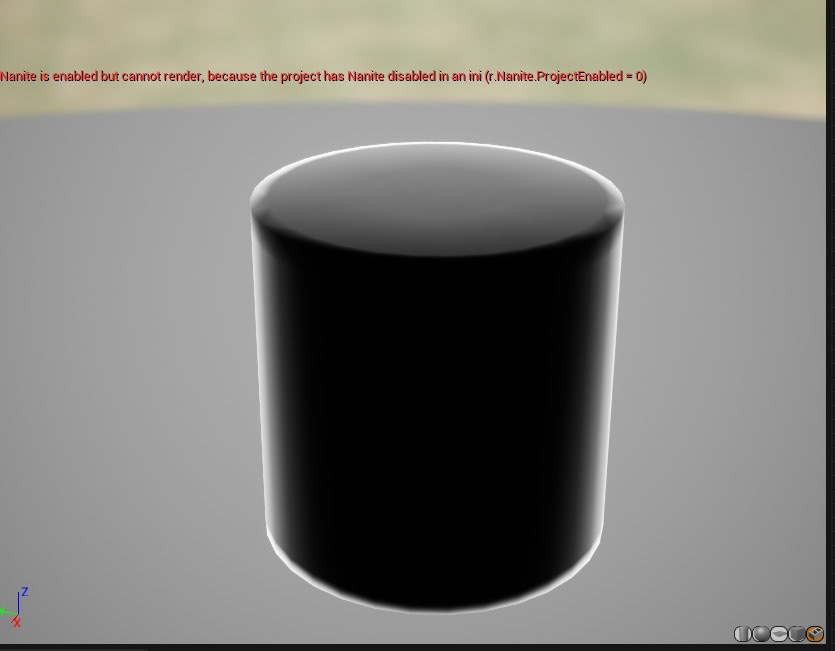
As you can see the situation is improved when we use smooth geometry, but now we have to avoid flat surfaces altogether, which may or may not be practical.
This reduces the problem with shallow angles, but doesn't resolve it completly either.
The solution I chose to use is to actually bake the smooth normals of the meshes into the vertex colors. In Blender, it's as easy as choosing smooth shading, baking the normals to the Vertex Colors and reverting back to auto-smooth shading. Some additional geometry gives better result to support the edges, but not much is needed. You may very well use a baked normal map for more precision, but this works for me as I will mostly be working with simple shapes.
This way, I can import the mesh and access the flat normals or the smooth normals at any time in the shader without an additonal sampler. This way, I can still use flat polys if I need to, although I will still try to avoid flat surfaces and author my meshes with this limitation in minde.
This is still approximate for edge detection, and we will later need to account for edge cases (pun intended). But this works and with a few lines of Python it's only a click of a button in Blender ¯\_(ツ)_/¯
NOTE: keep this in mind. This trick will actually be even more useful later on!
Back to it then shall we?
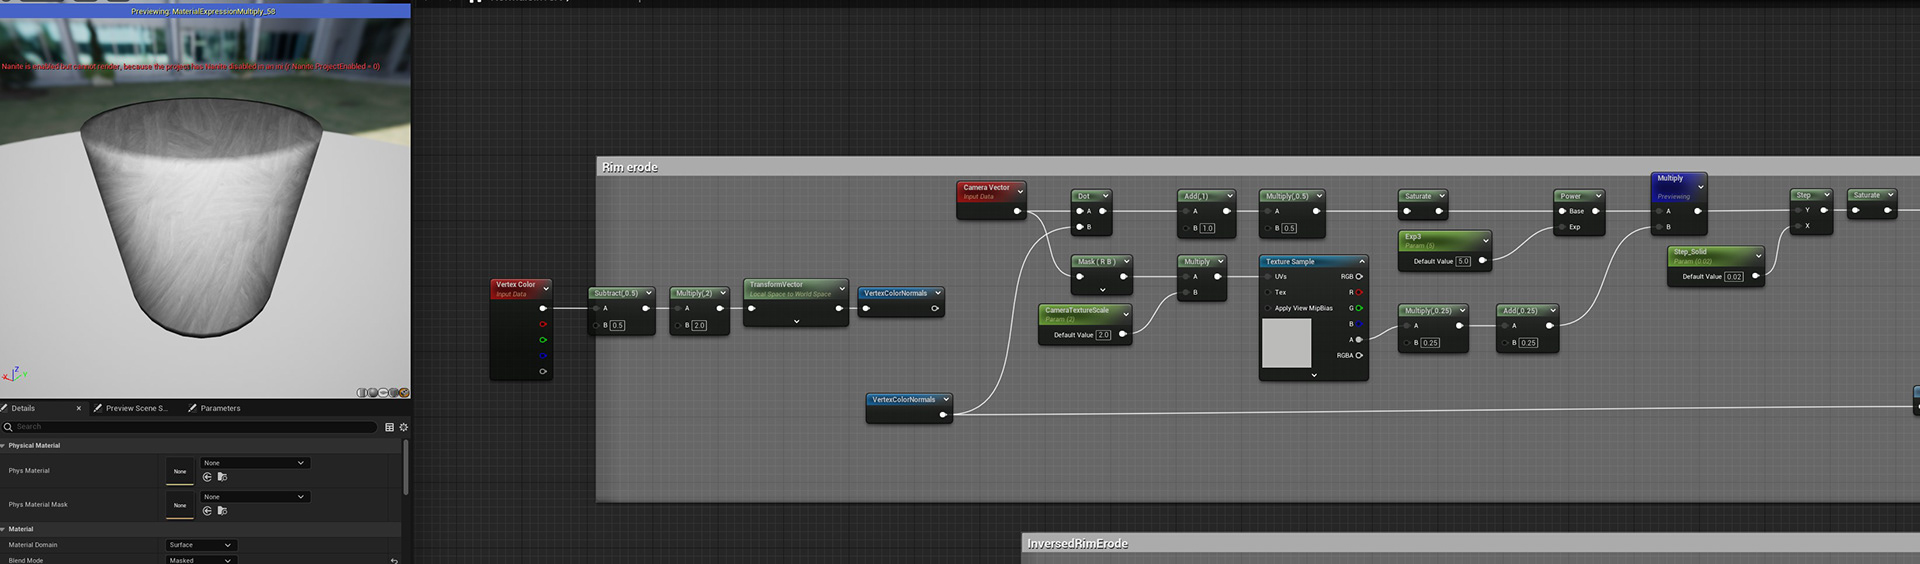
Rim Erosion
For this shader we are using a masked material (which is not actually indispensable for the core parts, but is useful in several ways due to some decisions that will be explained later one.)
In this next part we will cover what I call the "erosion" effect. This chips away at the edges with a brush texture, but must not disturb the silhouette too much.
For this effect and many other stylized looks, it is quite common to simple project a texture with the screen coordinates, like simple adding a layer on top of the image. This works fine for static images or even pre-rendered frames, however I really feel that for an interactive camera, the effect really falls apart as the user can quite cleary feel how the texture is projected when pivoting and panning.
Instead, I much prefer using the camera vector X and Y components to get a pseudo-view mapping that stays static with pivoting, and has a nicer effect when panning, but tastes may differ. Below you can see the comparison between the two.
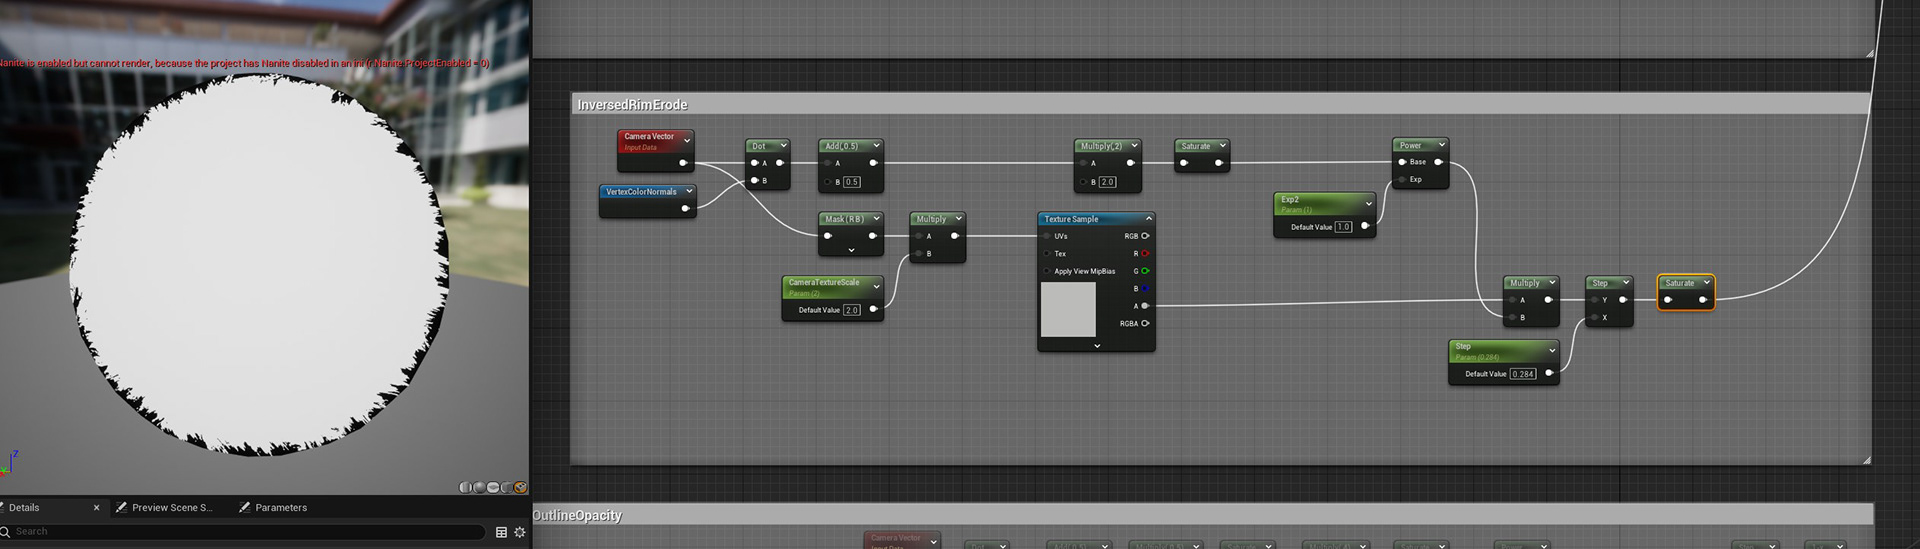
Here you can see how we generate a cheap fresnel with the dot product of the view vector, and the normal that we stored in the vertex color (translated from the 0 to 1 range to -1 to 1), and using the detail map to give a texture to the gradient. Then it's just a matter of stepping the result to get a 1 bit mask like below on the right:
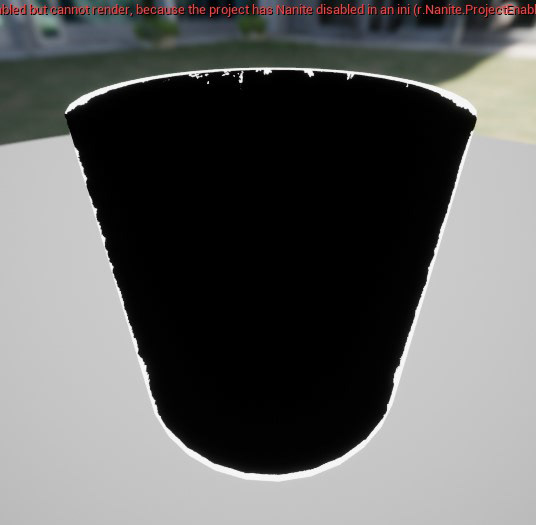
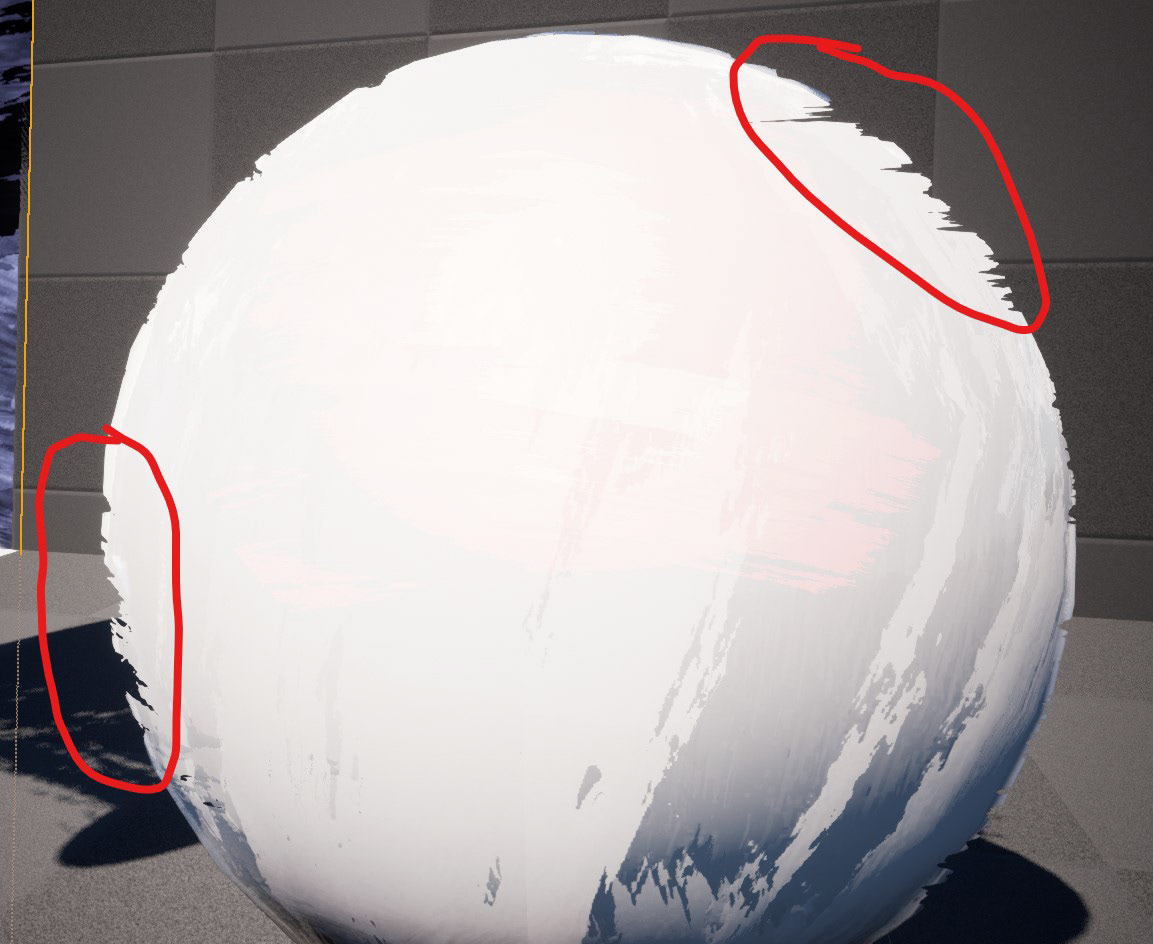
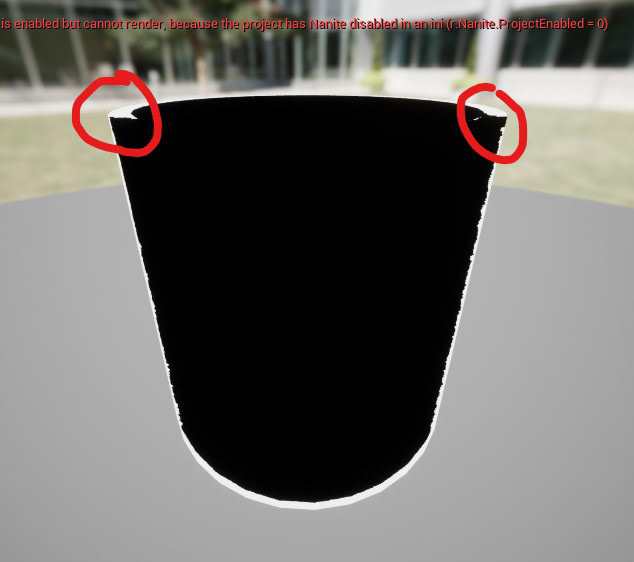
This mask is the result we want, but there's still a problem to solve. Since this mask "bites" the rims, it's important that it doesn't mask important parts of our mesh. Unfortunately, we saw in our little fresnel digression that flat faces at shallow angles can still have undesired shading, even while using the smooth vertex normals:
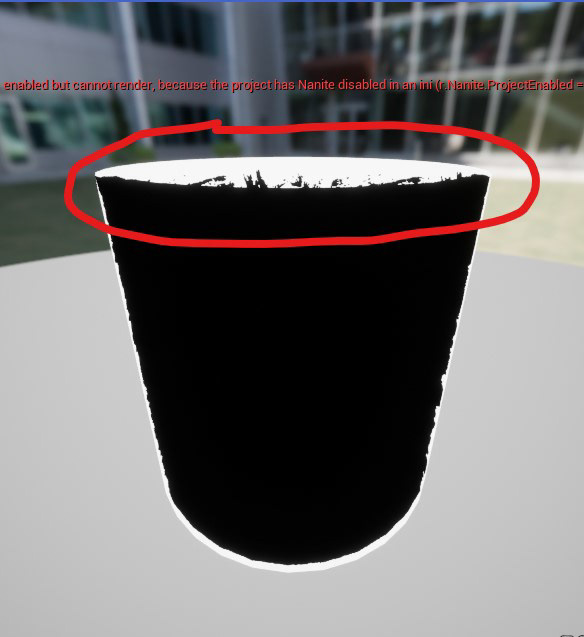
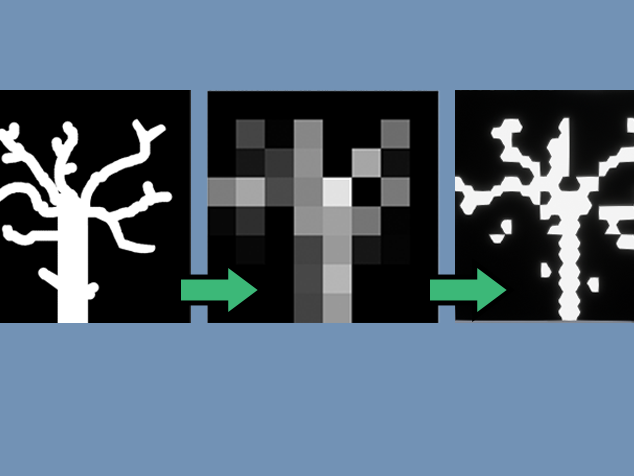
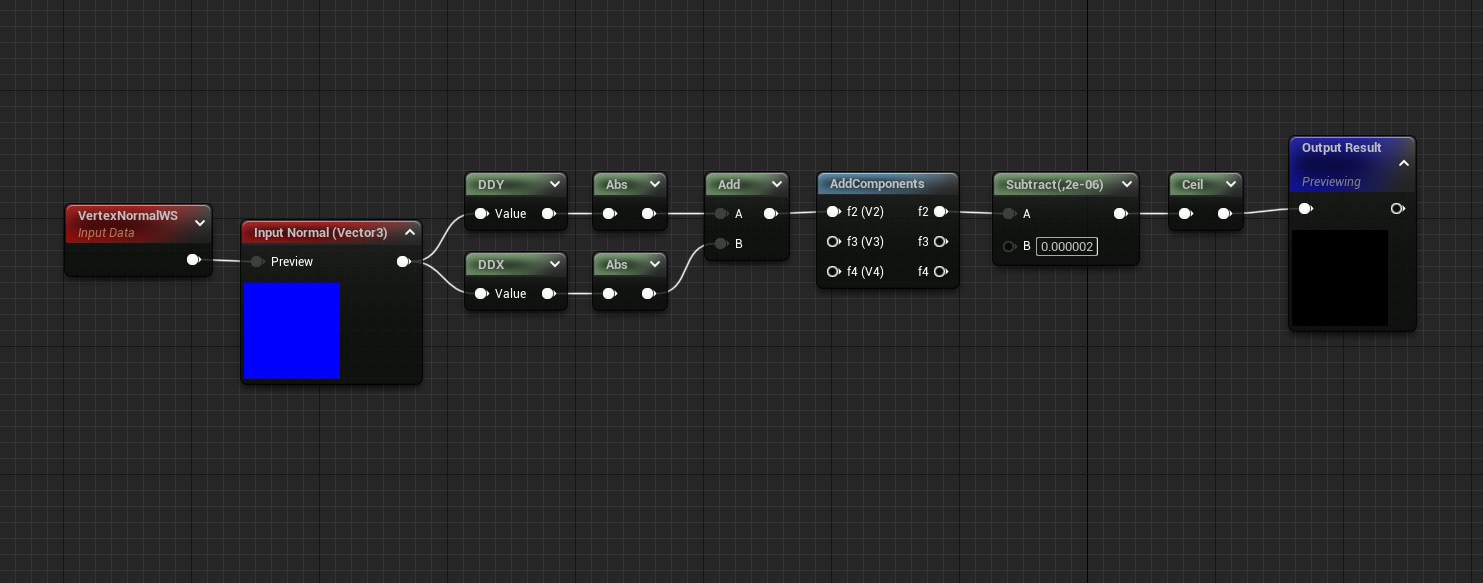
To avoid these artifacts, I've made a small function that computes the curvature of faces from the normals. Since we use the vertex color normals as input, we don't mask the whole flat face, but only the "smooth flat" parts, thus excluding from the mask the edges of the disc, that we want to keep:
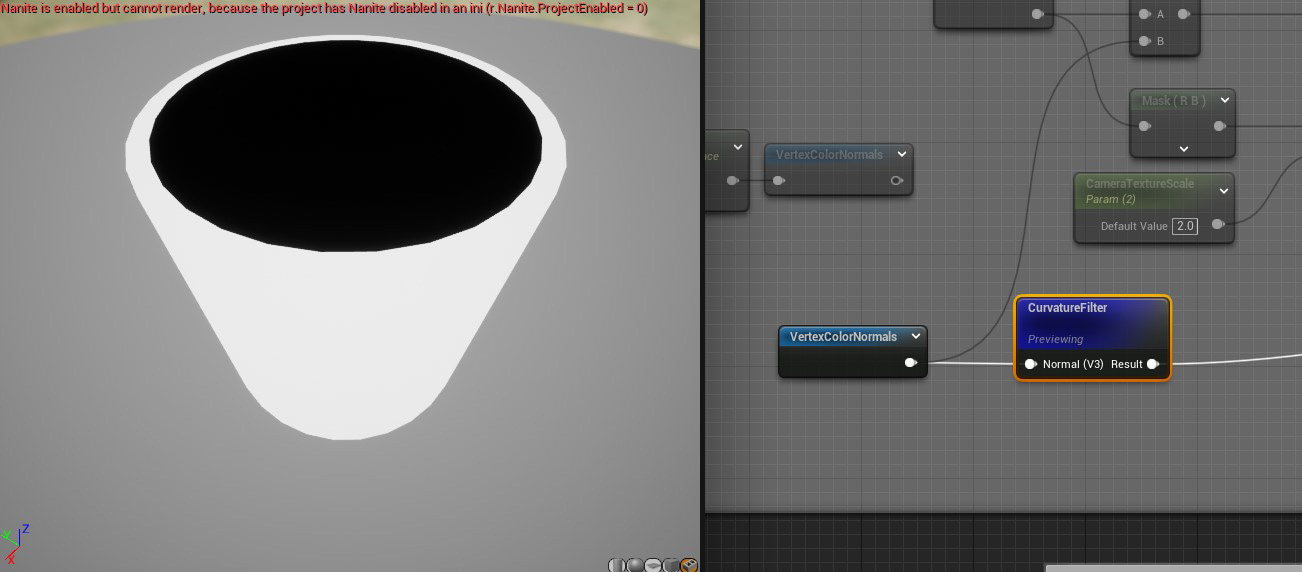
The idea behind this curvature filter is very simple. Modern GPUs process pixels in batches of 4, and we can access the delta between the pixel values using the DDY and DDX instructions. If we feed the normals into DDY and DDX, it will give us 0 if the face is flat, else it will return the normal difference between the pixels, or some simplified curvature. We simply take the absolute curvature on Y and X and add it together. We need to add a very small value at the end to get rid of floating point imprecisions. Inelegant but necessary.
Once combined with our first mask, this allows us to avoid flat faces being completly masked, at the cost of some more minor artifacts, that I can live with:
We can then feed this mask into our opacity and get a nice paint erosion effect around our edges.
Outer rim and offsetted outlines
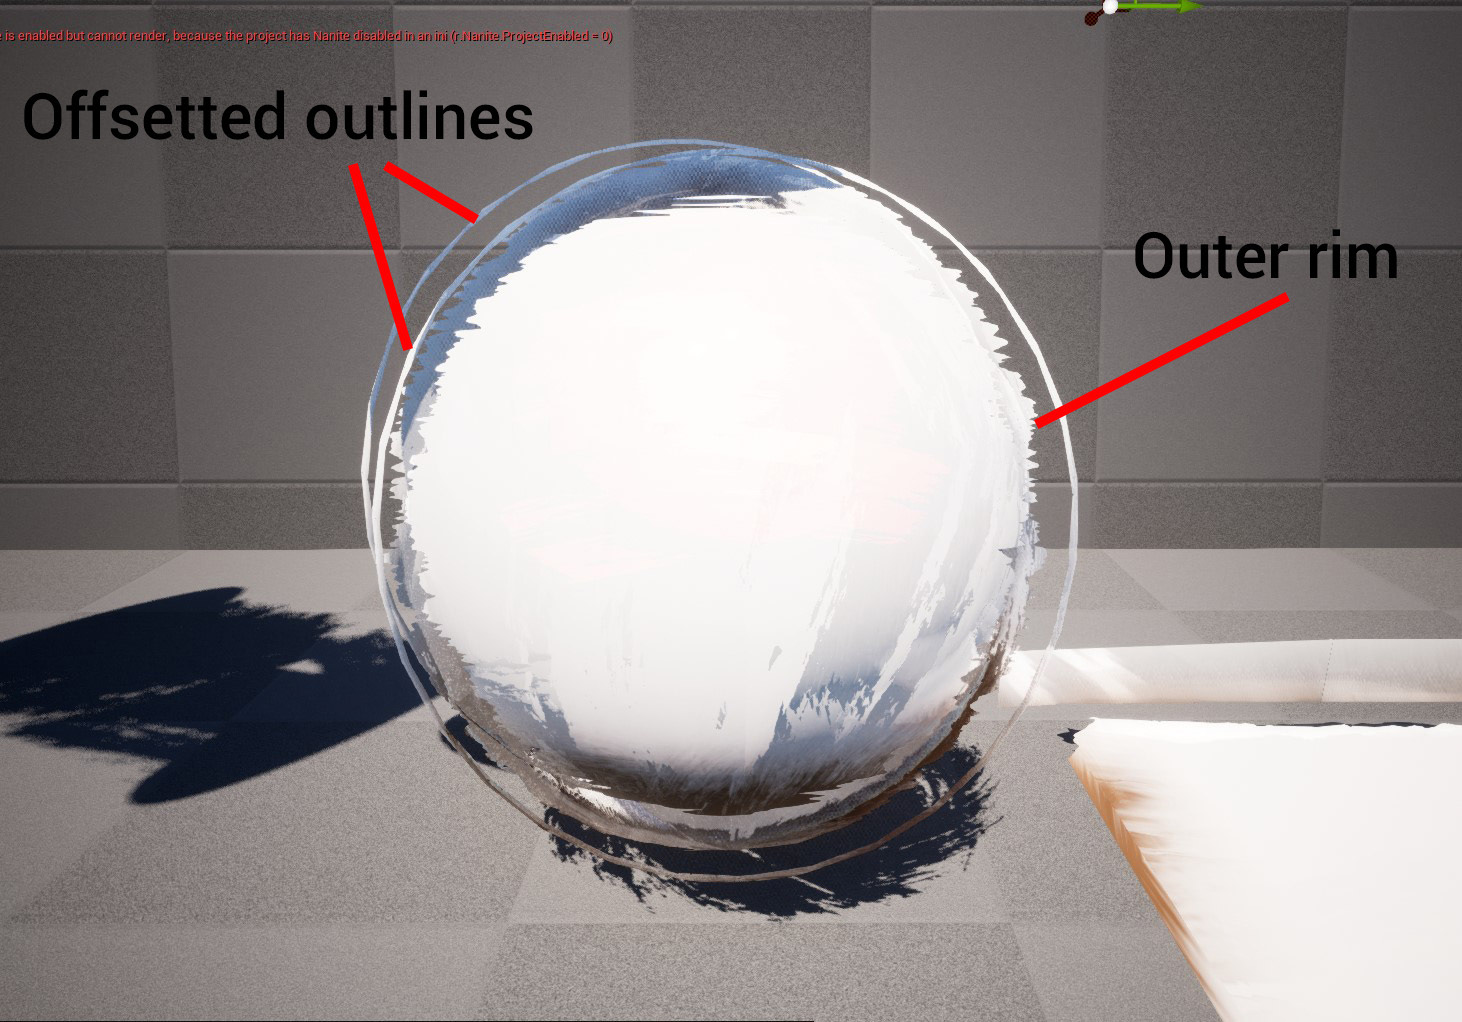
Before we go further I need to explain a choice I've made that makes things a little more complicated than they probably have to be.
For now I've only been showing the "solid" part of the shader, but it turns out that the outer rim, and outlines, are actually part of the same shader. This is not strictly necessary, but I wanted to try to see if I could achieve this effect without causing additonal draw calls.
To avoid a new draw call, we cannot:
- use another geometry for the rim and outlines
- use another material either.
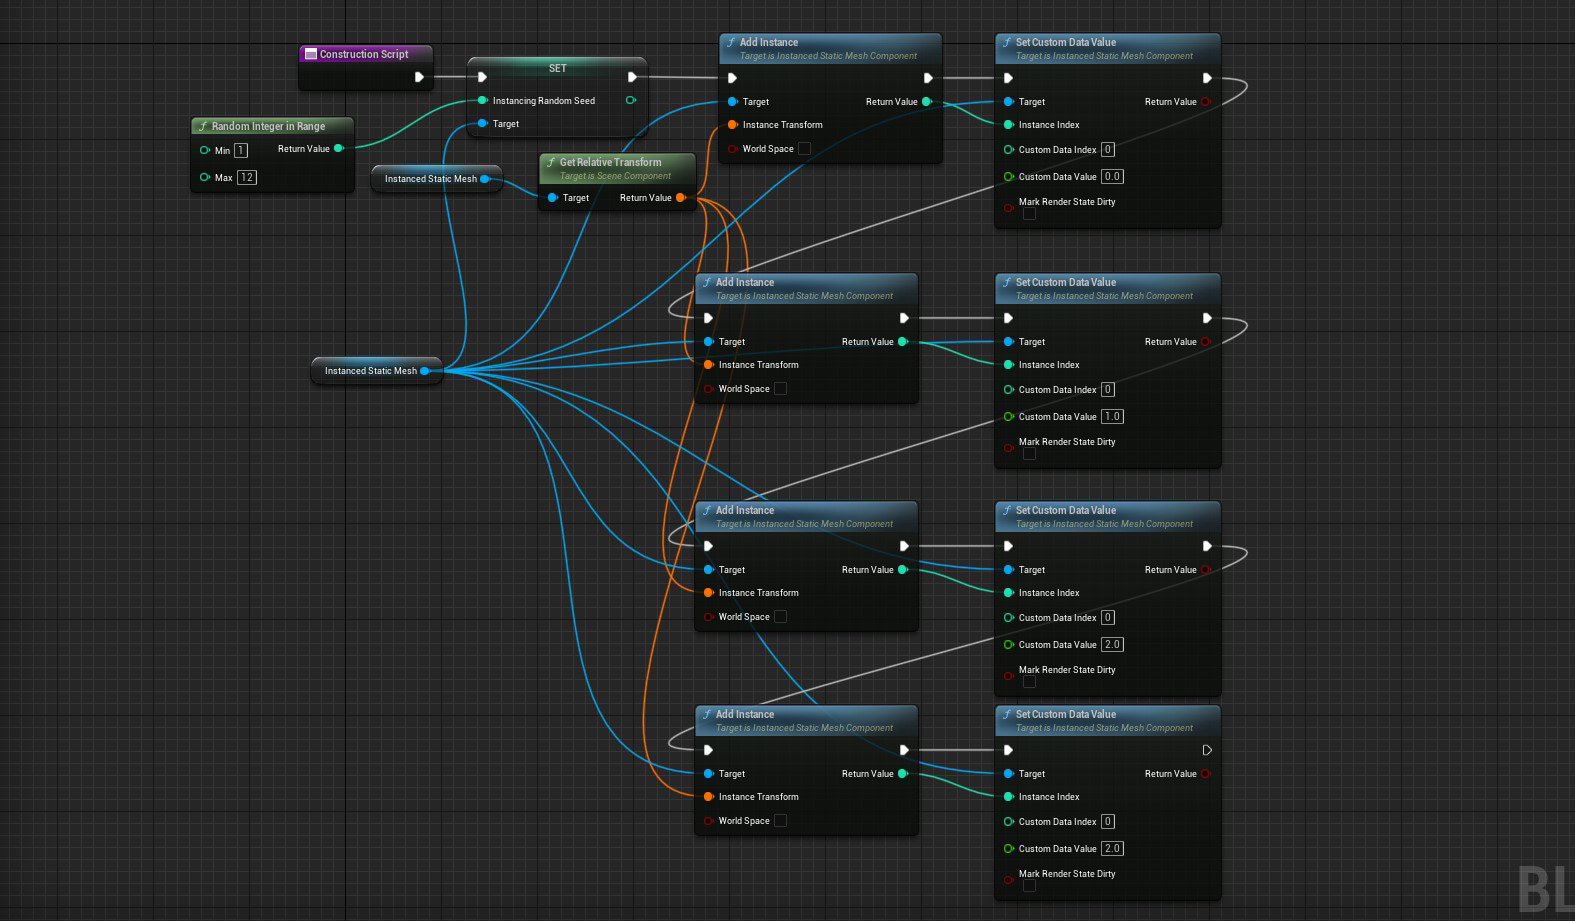
We can however, instance the original mesh and pass a parameter to the shader for each individual instance.
This is what is happening here, 4 instances of the same mesh with a custom data index of 0.0 for the base, 1.0 for the rim, and 2.0 for the two outlines.
This, however, brings about a new problem. My favorite technique for clean outlines or rims on objects is well known, it is to duplicate the mesh and invert the normals, then inflate it by some amount and combine the two. I've used this technique in this Calvin & Hobbes hommage ages ago

Well, this leaves us in somewhat of a bind, for two reasons. One, inverting normals.
It's a trivial operation, but in Unreal we get control of the shader too late in the pipeline, it's not possible to easily invert normals using the provided VS and PS.
Two, inflating. Inflating works fine on a smooth object, it's only a matter of adding a world offset using the face normal... But it breaks down when using sharp geometry!
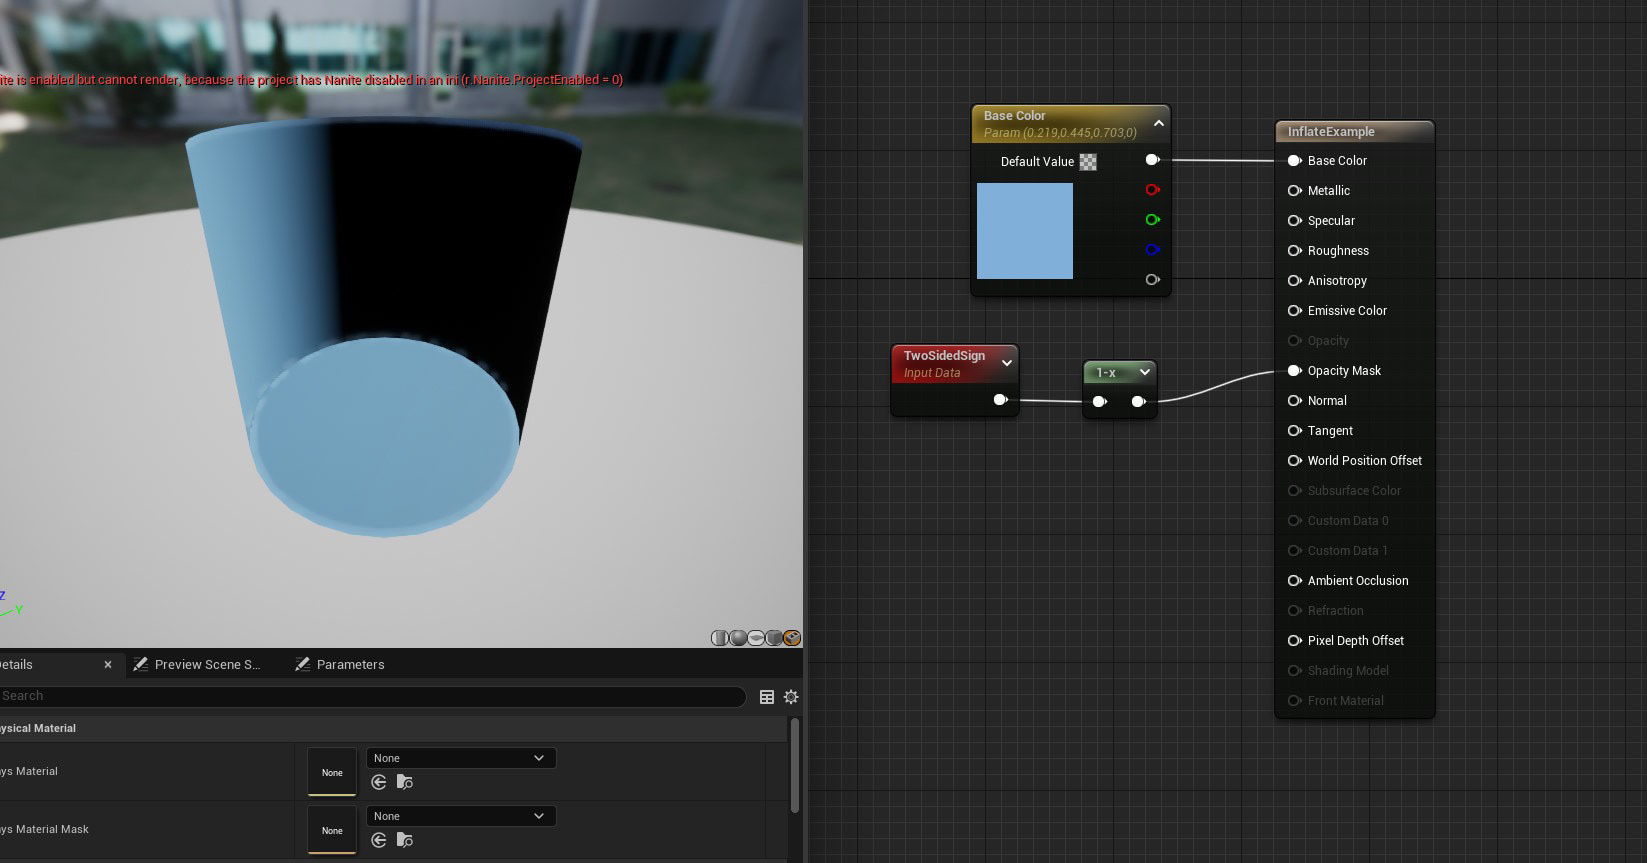
This is where our stored vertex color normals make their come back! To inflate the mesh properly, we can simply use them instead of the true vertex normal and voilà! Our mesh inflates properly! (Minus some imprecision due to the vertex color range)
And here is the solution I found to "pseudo invert" the normals. Simply use a two sided masked material and use the "TwoSidedSign" flag to mask the front faces. A little brute force but it works.
Now, at the cost of some gymnastics, we can inflate and invert our instances to our heart's content.
Our OuterRim erosion mask is slightly different than the previous one as it needs to work for backfaces and is more pronounced. We will not be using the curvature mask here, because this outer rim will be displayed behind our "solid" mesh, and we don't need to preserve the silhouette for the outer rim.
This outer rim uses the same diffuse input as our solid mesh.
We simply put the outer rim instance in the same place as our first instance, inflate it by some amount and we get a nice rim:
The mask for the outline is more straightforward, this below is a little messy but you get the jist:
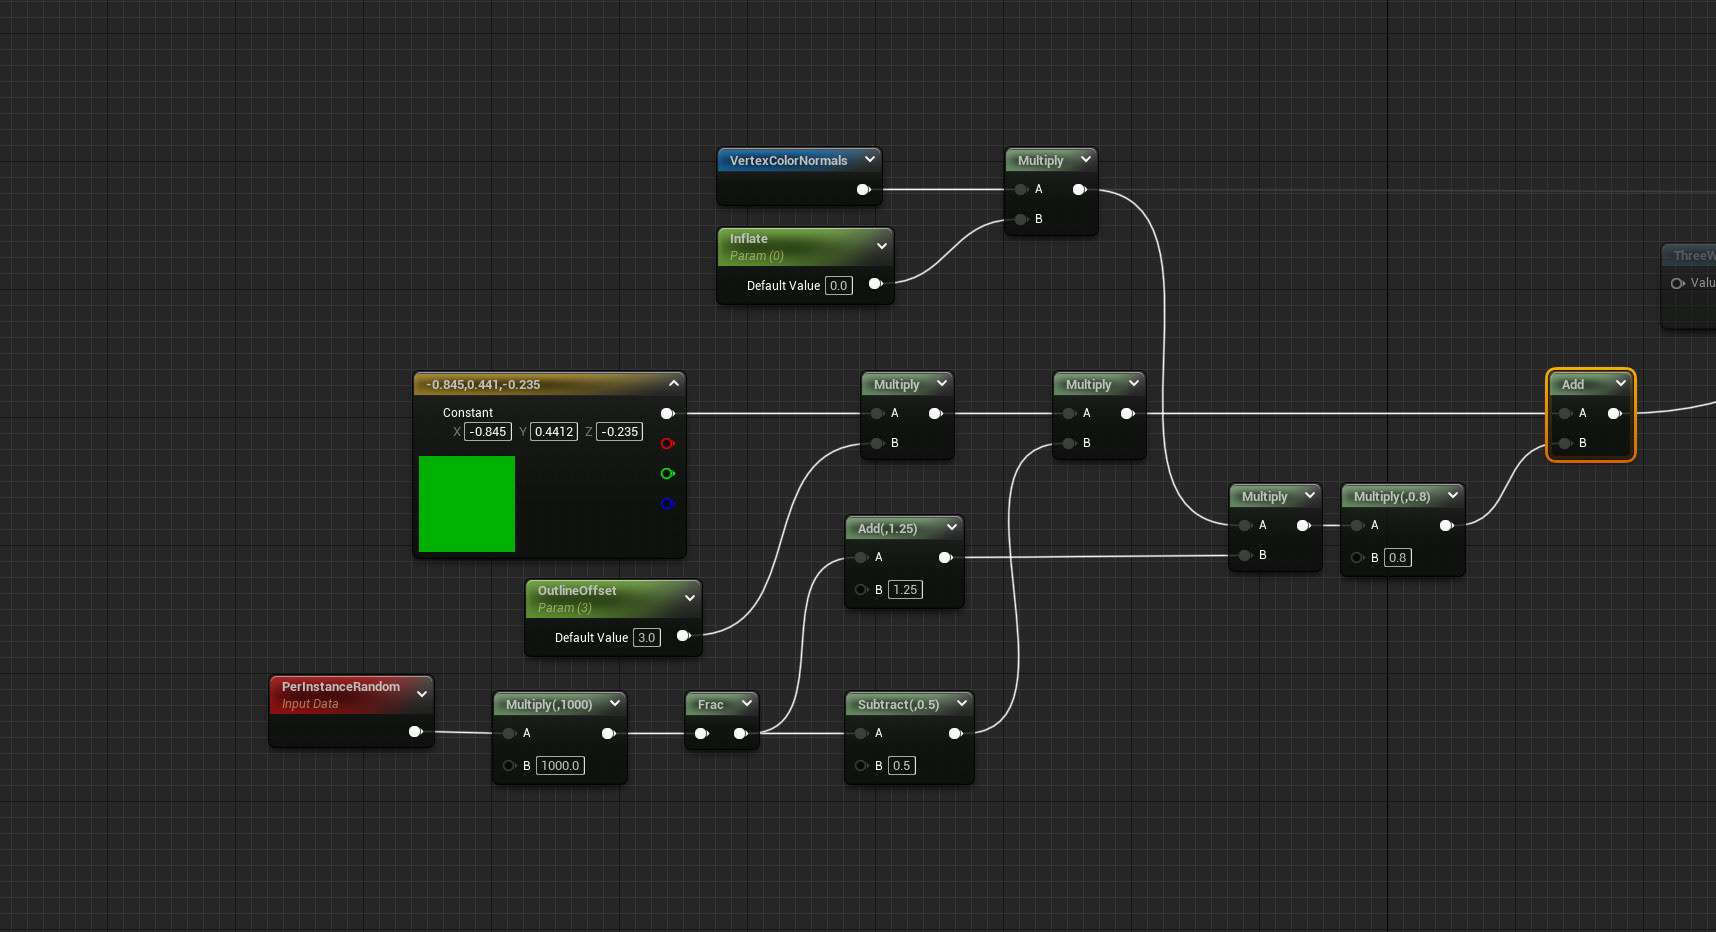
For the outlines, it's not enough to inflate them, we can also add a random offset to get the effect of approximate strokes, for this we can use the random value per instance node, mulitplied against a hardcoded random vector, each of the two instances slightly differently.
Shadows
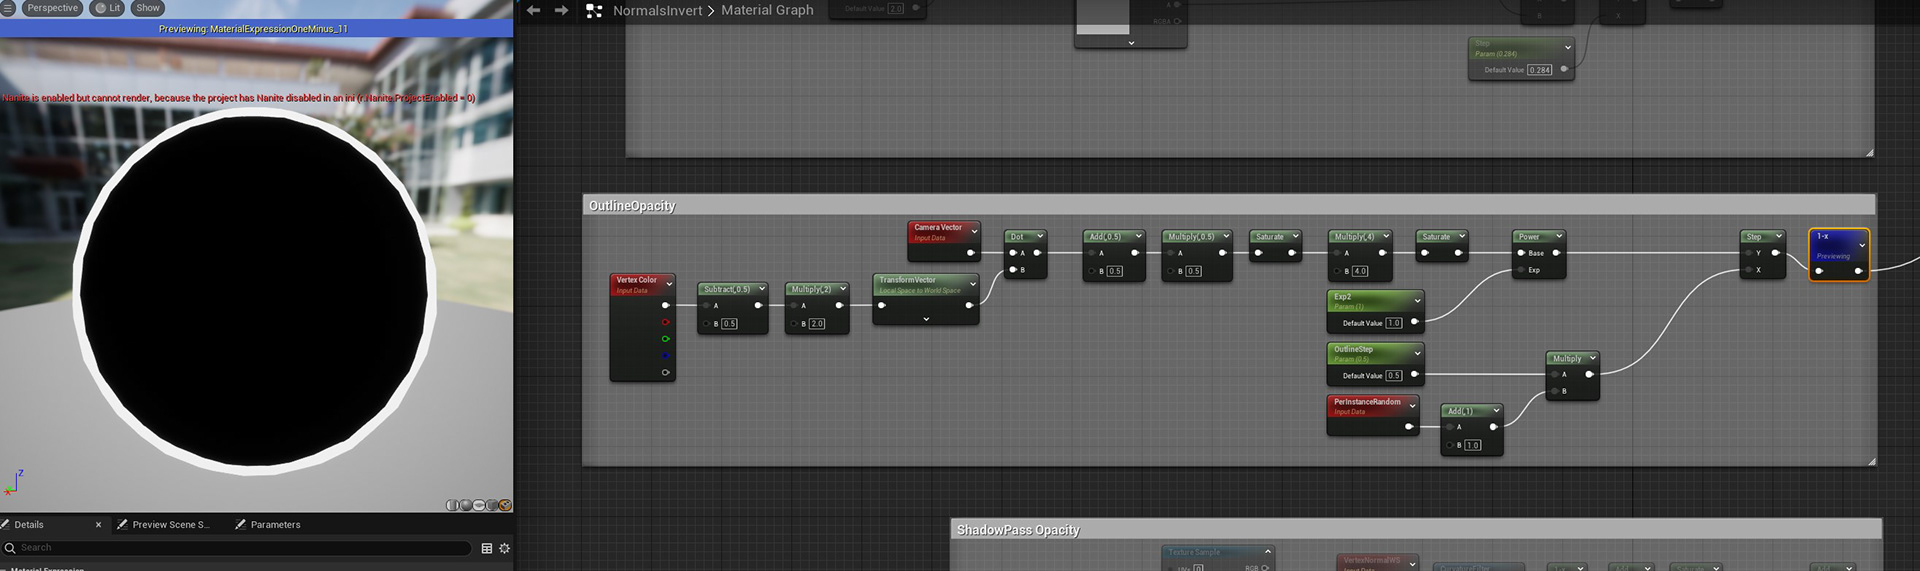
To get stylized shadows, since we are already bound to a masked shader, I simply override the opacity during the shadow pass:
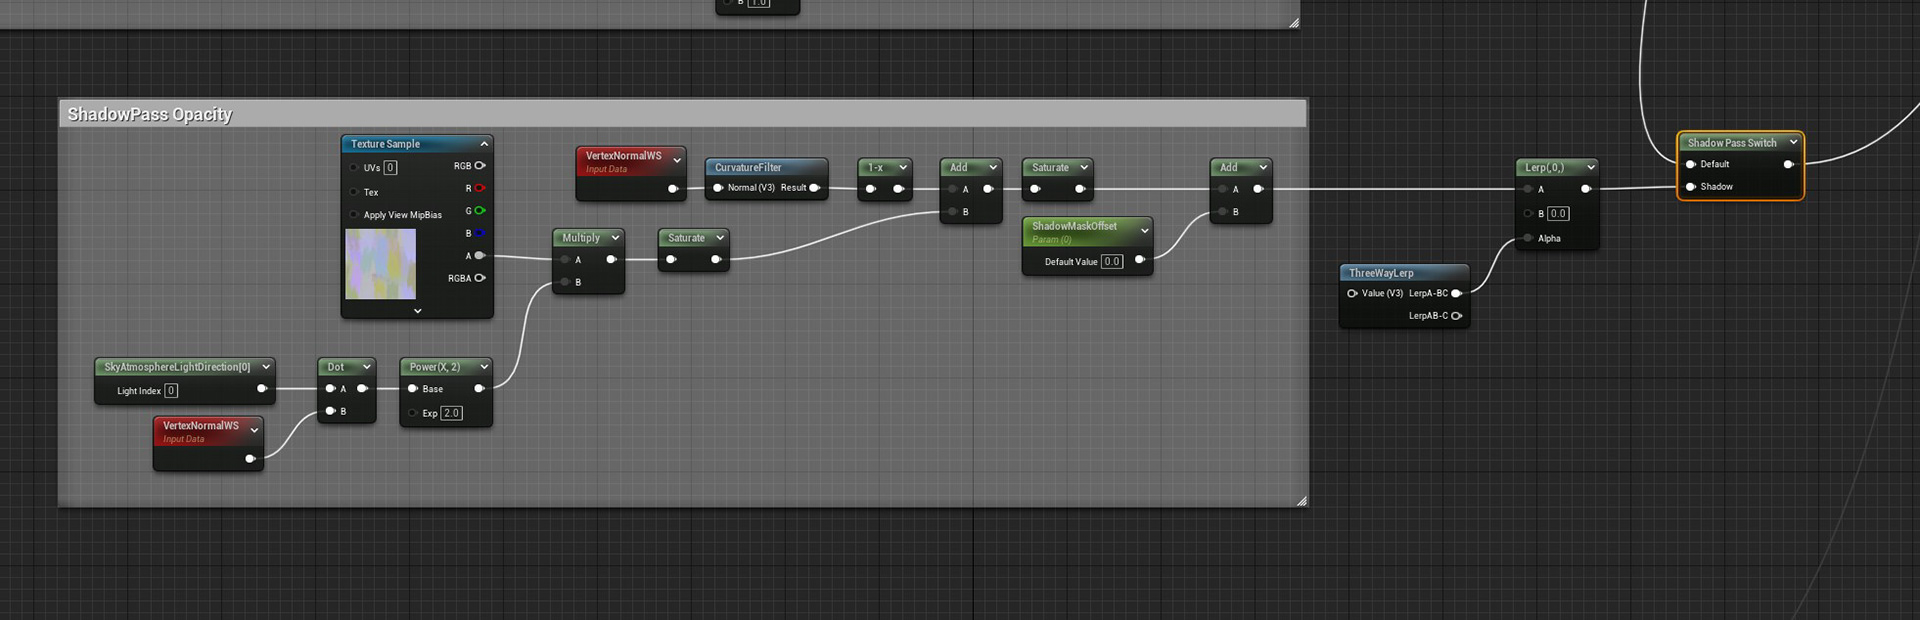
This is basically exactly the same effect as our eroded rim, but with separate controls, and more pronounced:
All that is left now is to mix all of these parts using a simple lerps (see note on dynamic branching at the end of this article) based on the instance parameters.
The final graph is relatively big, but not that much if you consider the amount of work we are doing:
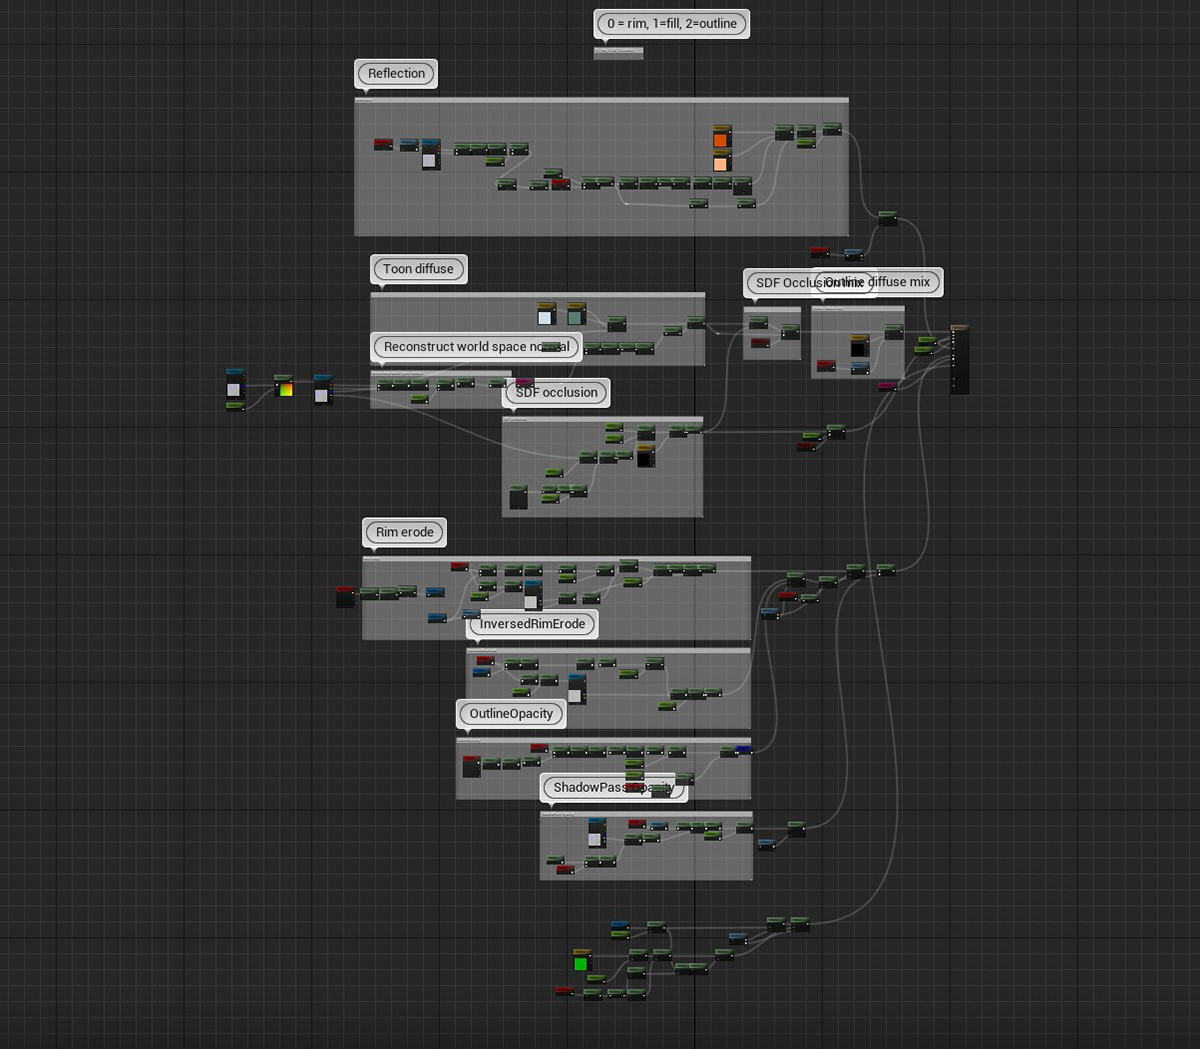
Performance and notes
The version presented here is reasonably performant, but it hasn't been fully optimized. I have yet to test if it's worth saving the draw calls at the expanse of shader complexity.
It would almost definently be worth it if we could use dynamic branching properly within the node graph, unfortunately this would require hardcoding some custom nodes, which is definently possible but not very practical. Dynamic branching within unreal is the subject of a heated debate here.
Having a two-sided masked material is also a drawback, especially for the "solid" part of the shader.
A good optimisation pass would be to reuse more of the same code for similar parts such as the different rims and outlines.
SDF AO is definently the most expensive computation, but I've yet to find a more efficient method.
One thing I quite like about this shader is that it works around the usual pipeline proposed by unreal in some hacky ways, but in the end it still works with all of UE's systems, and it works quite well with Lumen as a regular lit shader, as a metallic material, and all in all can be integrated quite seamlessly in a scene since it's not dependant on post-processes.
It's only dependant on one texture so it'd be easy to get many looks out of it by changing the strokes styles in the texture.